
1.Introduction
Welcome to the electronic interaction world! DFRobot proudly presents the Arduino beginner kit for those who are interested in learning about Arduino. Starting from basic LED control to more advanced IR remote control, this kit will guide you through the world of microcontrollers and physical computing.
A DFRduino UNO R3 (Compatible with Arduino Uno), the most stable and commonly used Arduino processor, together with DFRobot's best selling prototype shield are included in this kit.
Beginner Kit for Arduino has strict guidelines on how it makes packaging design, hardware selection, and circuit production technology, meaning that DFRobot can always provide you with quality assurance.
Features
- Including common electronic components, e.g., resistors with different resistance values, LED and photosensitive diode.
- Supports mobile APP to view the learning course and download the code.
- 15 project cards suitable for diversified and flexible use in classroom.
Getting Started with Arduino
Introduction: What Arduino is and why you'd want to use it.
Installation: Step-by-step instructions for setting up the Arduino software and connecting it to an Arduino Uno.
Windows Mac OS X
Environment: Description of the Arduino development environment and how to change the default language.
Libraries: Using and installing Arduino libraries.
2.Systematic Course Setup
Course Outline
There are 15 projects in the Arduino Getting Started tutorial to help you learn Adruino step by step from easy material to even the most difficult of concepts. The whole set of tutorials provides learning content for both the software and hardware systems. In the process of making interesting projects, you will not only learn programming knowledge such as variables and functions, but also understand the principles behind using electronic components such as light-emitting diodes, buzzers, and steering gears.

Course Structure
Each course will guide you through a quick implementation of the project, stimulate your interest in learning, and then delve into the knowledge of electronics and programming. So, the structure of this curriculum is broken down into the following: “materials list --> hardware connection --> code writing --> code review --> hardware review.”
Different from other tutorials, this tutorial systematically explains how to interpret Arduino code and how to understand the principles of electronic circuits in order to help you make creative Arduino programming projects.

Project Cards
The beginner kit for Arduino includes 15 project cards with detailed circuit diagrams. The students can choose any project they want to start creating what they are interested in. The kit effectively helps teachers launch workshops at school.

3. Arduino Starter Kit Tutorial
Click to view online tutorial: https://edu.dfrobot.com/ & https://www.dfrobot.com/blog-588.html
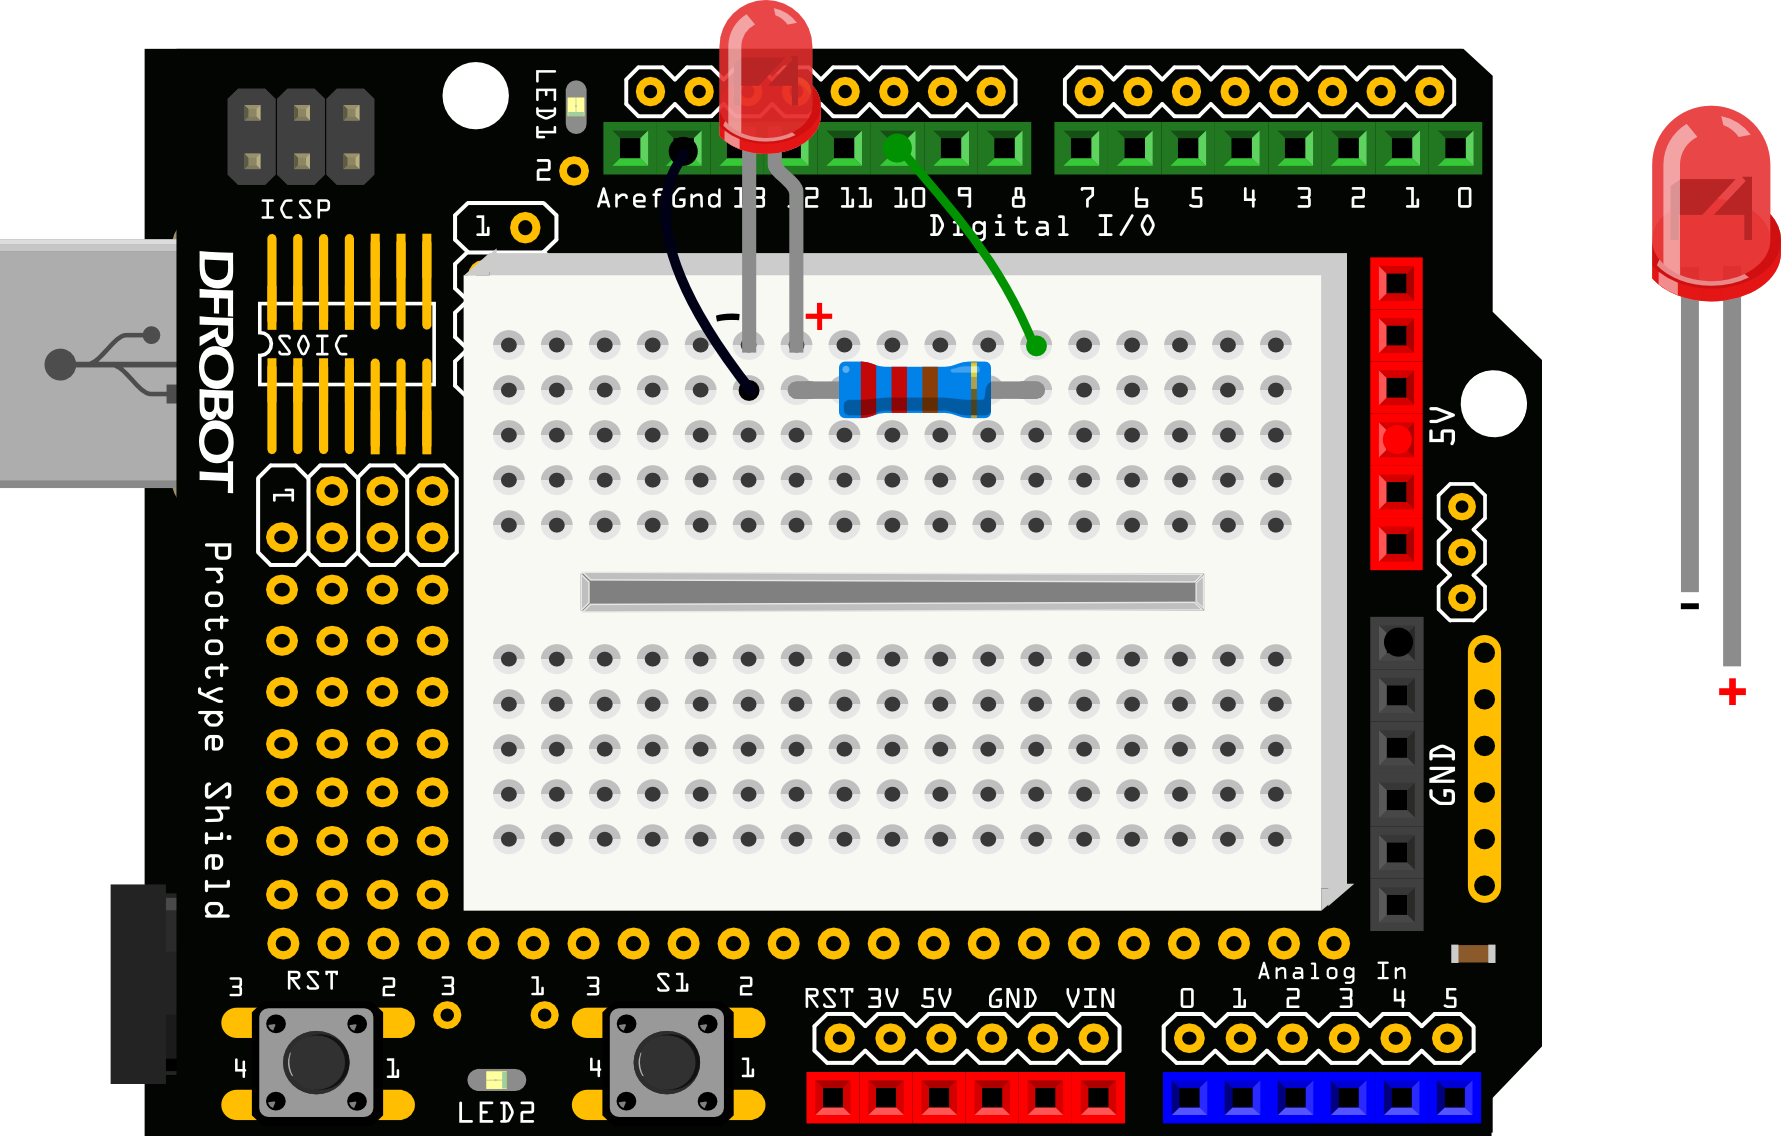
3.1 Arduino Tutorial : Blinking a LED
3.2 Arduino Tutorial : SOS Beacon
The connection diagram is the same with Blinknig a LED tutorial.
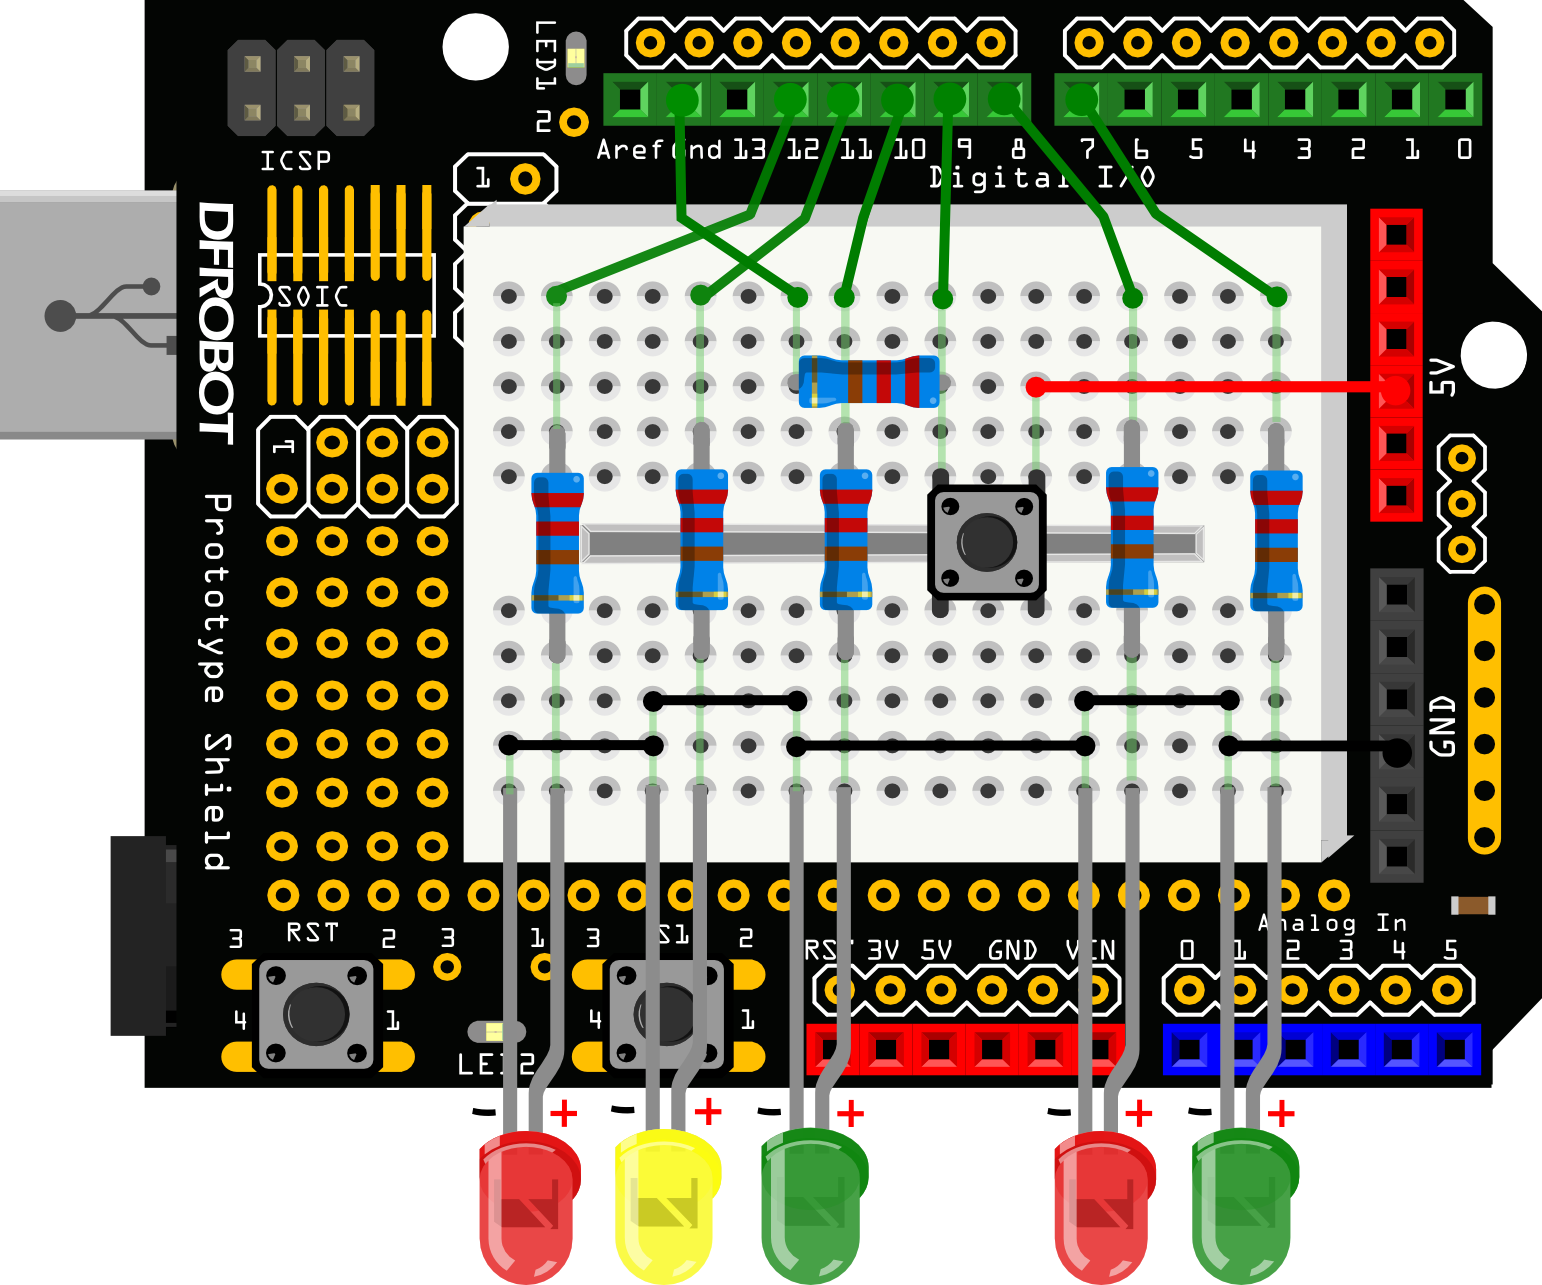
3.3 Arduino Tutorial : Traffic Light
3.4 Arduino Tutorial : Fading Light
The connection diagram is the same with Blinknig a LED tutorial.
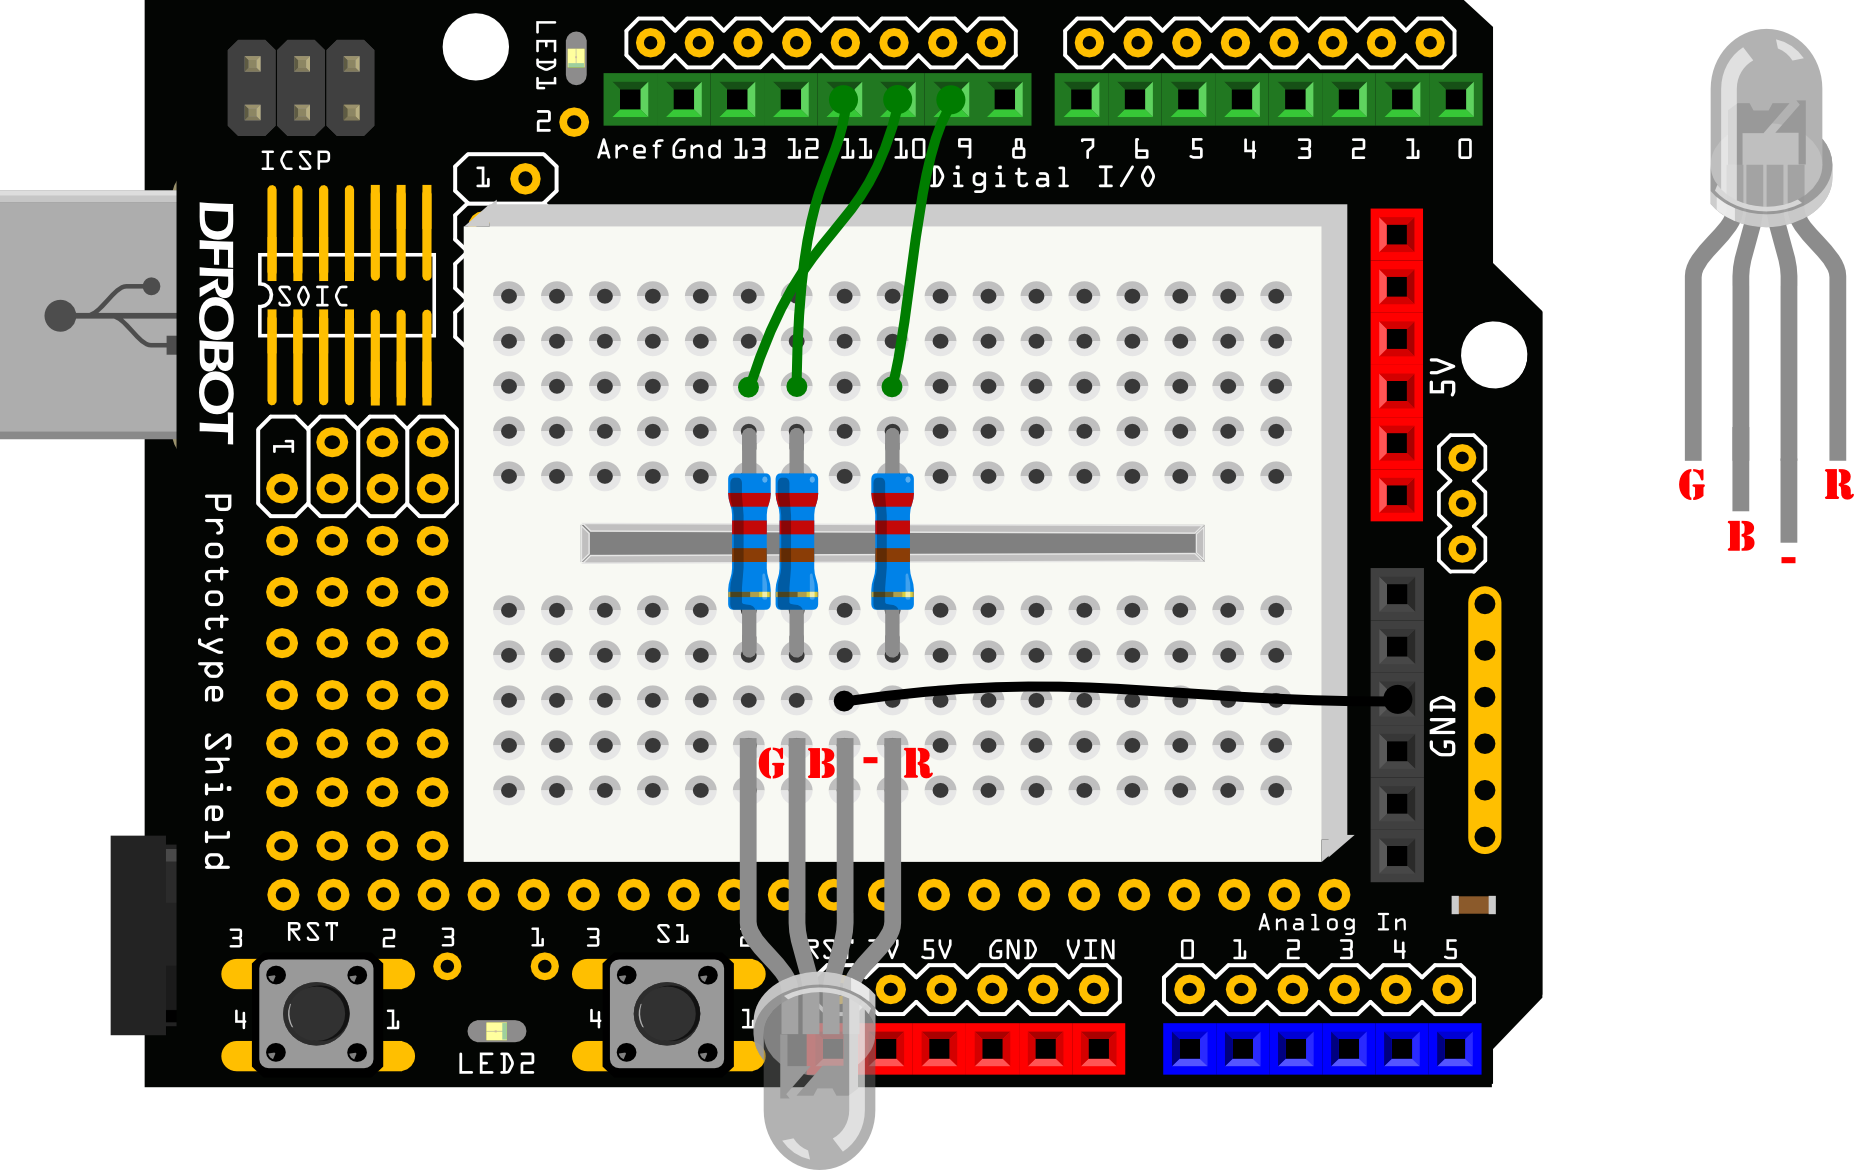
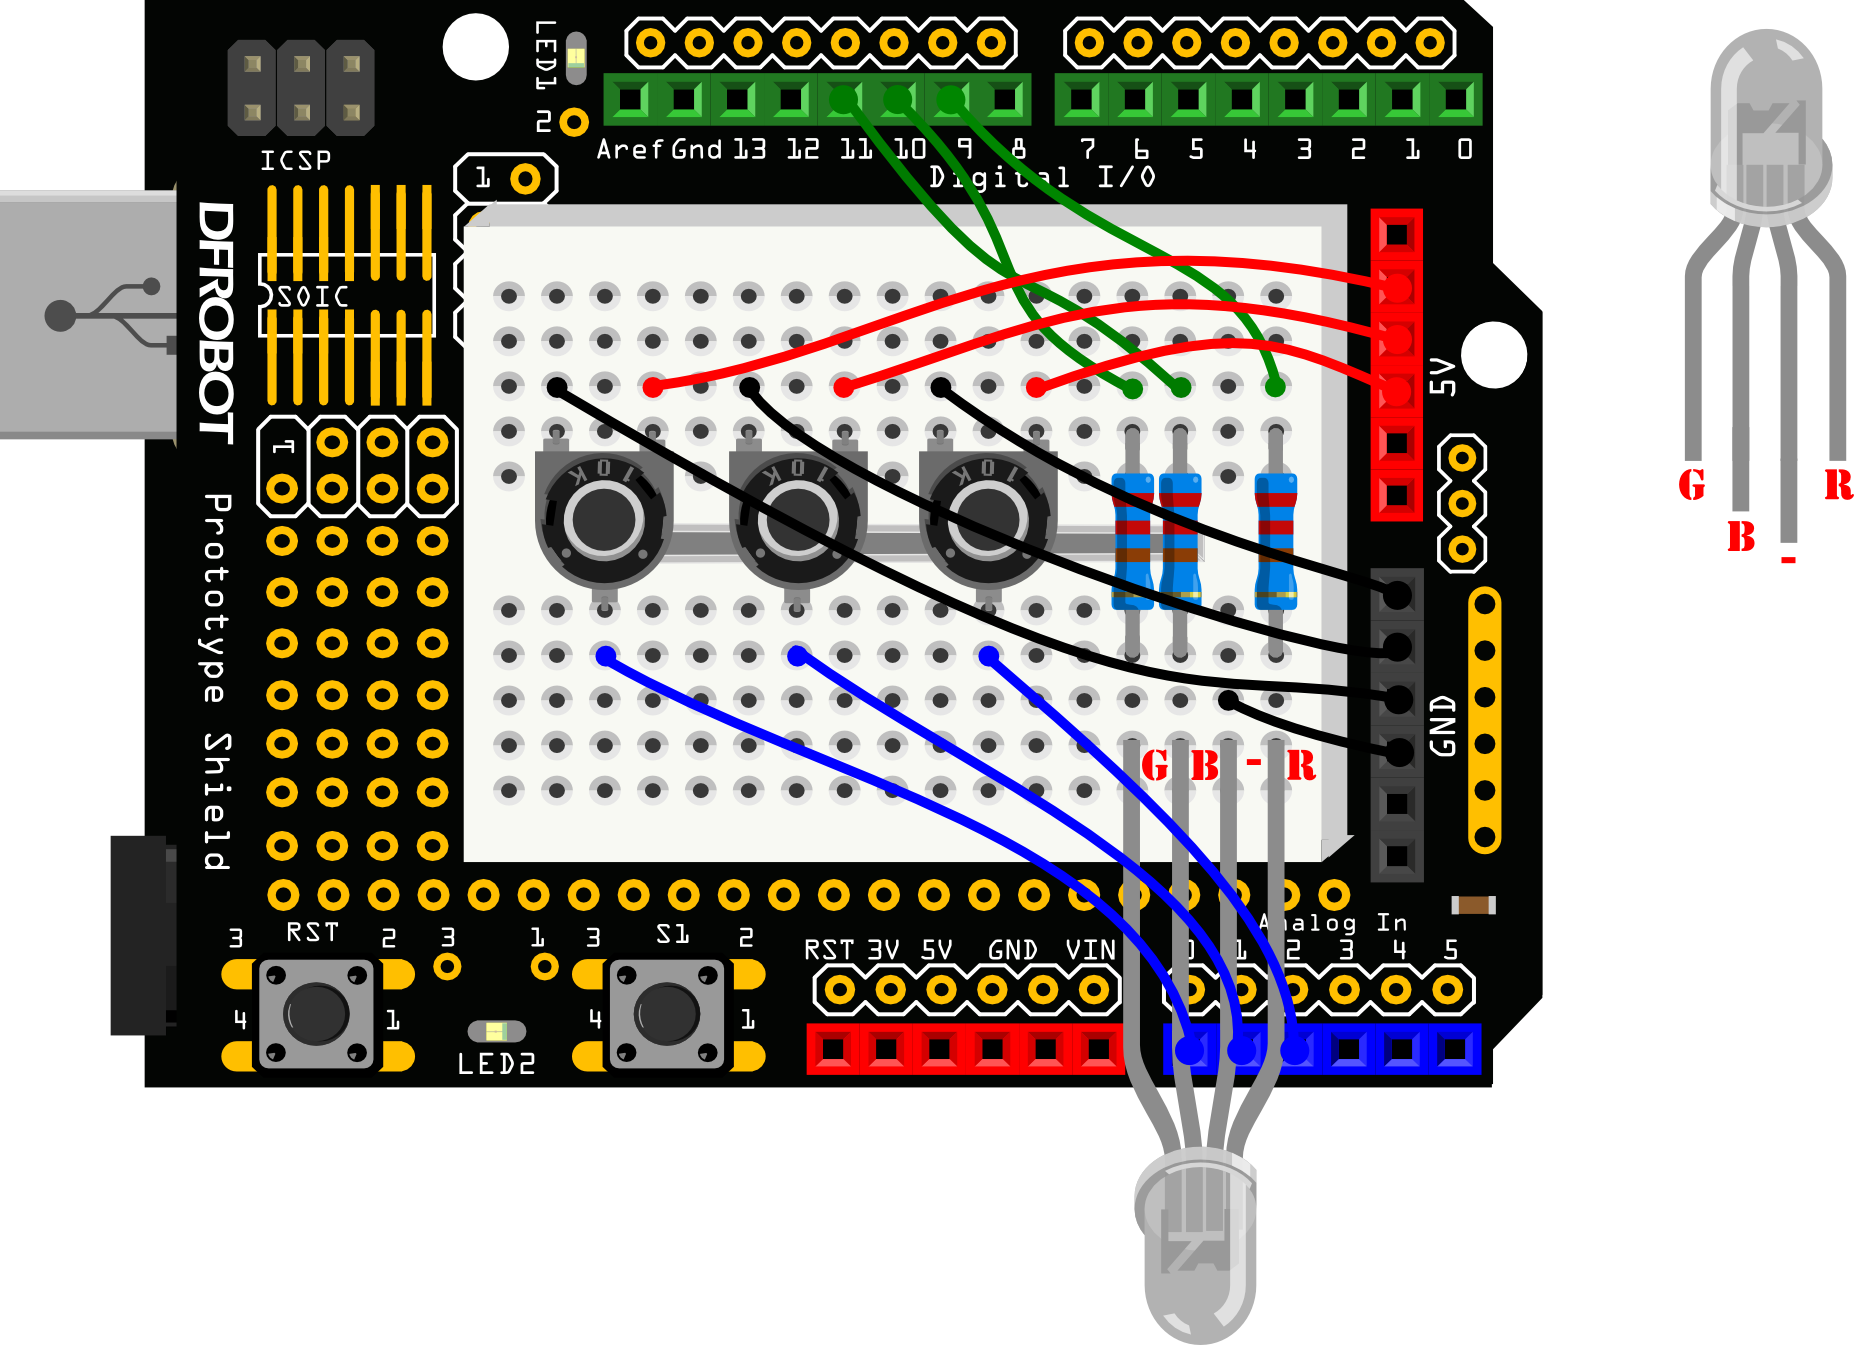
3.5 Arduino Tutorial : RGB LED
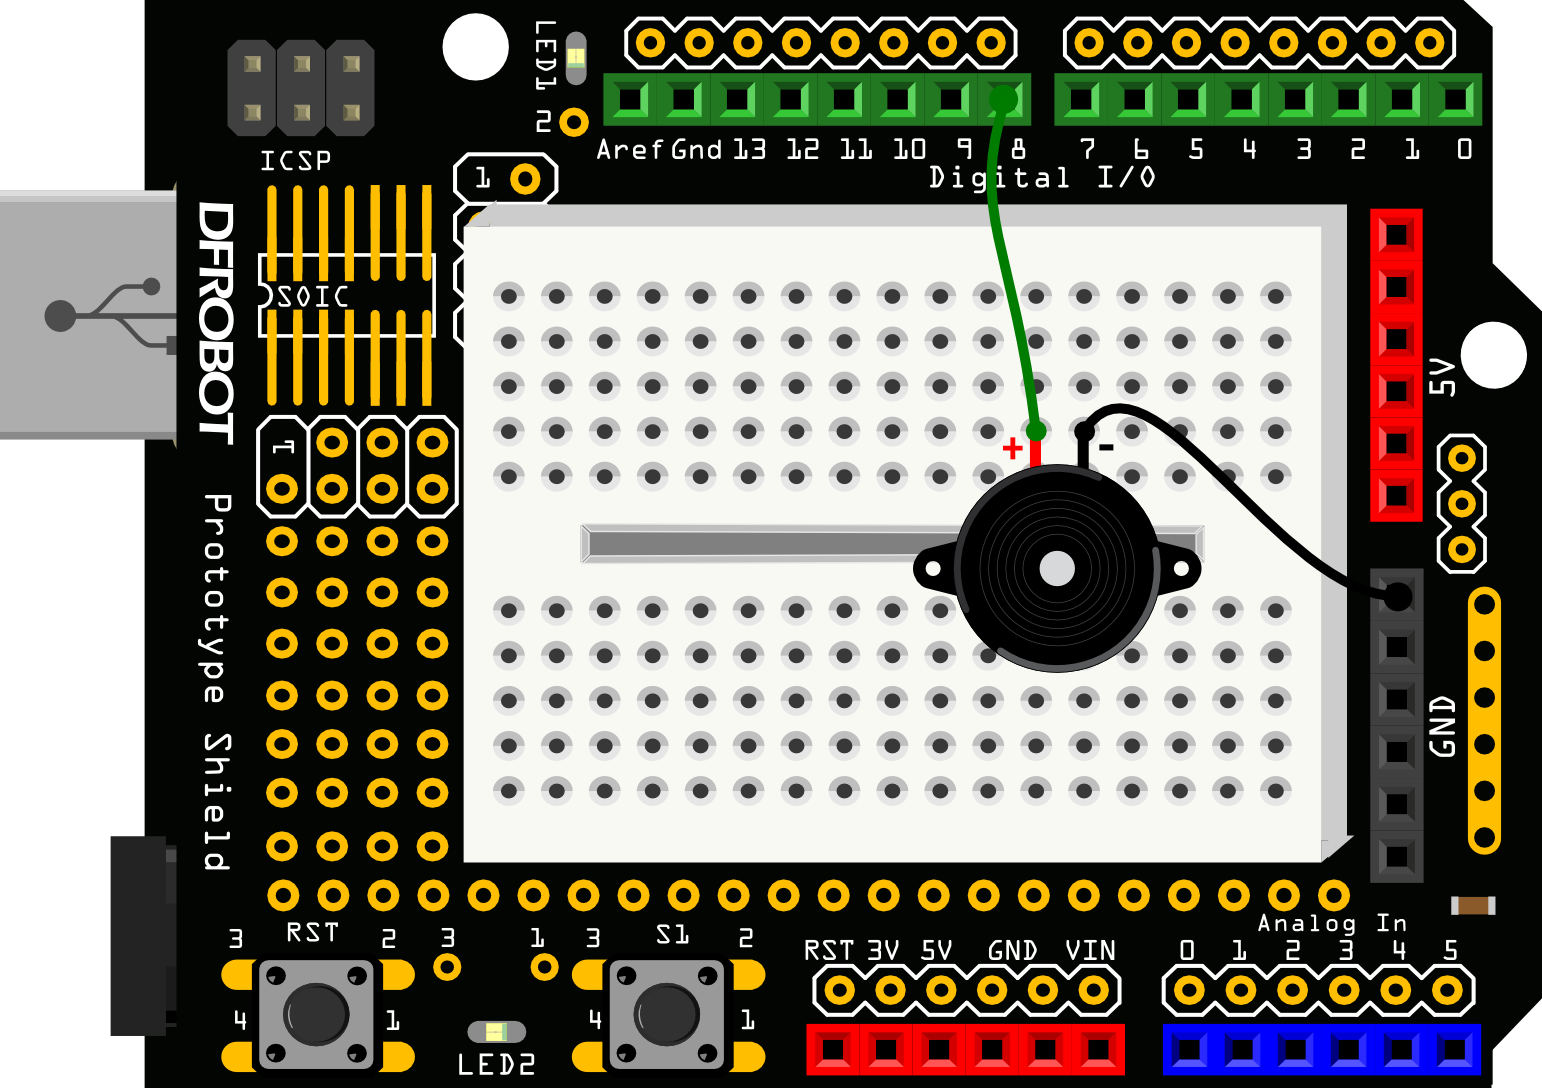
3.6 Arduino Tutorial : Alarm
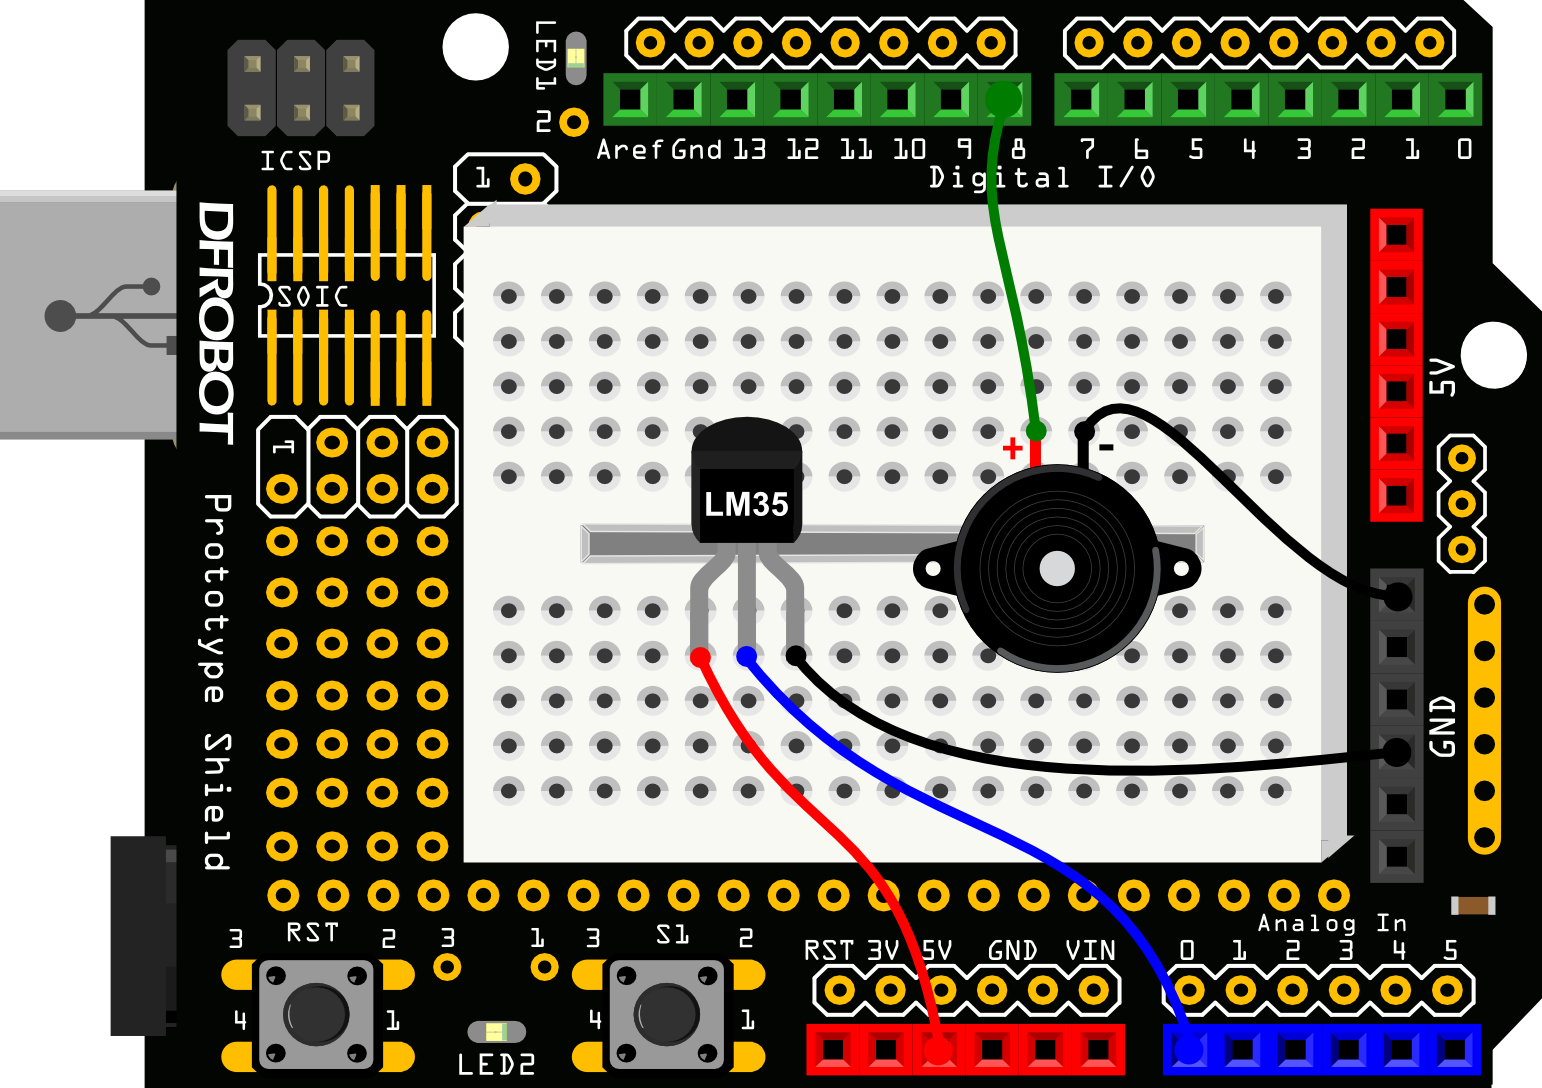
3.7 Arduino Tutorial : Temperature Alarm
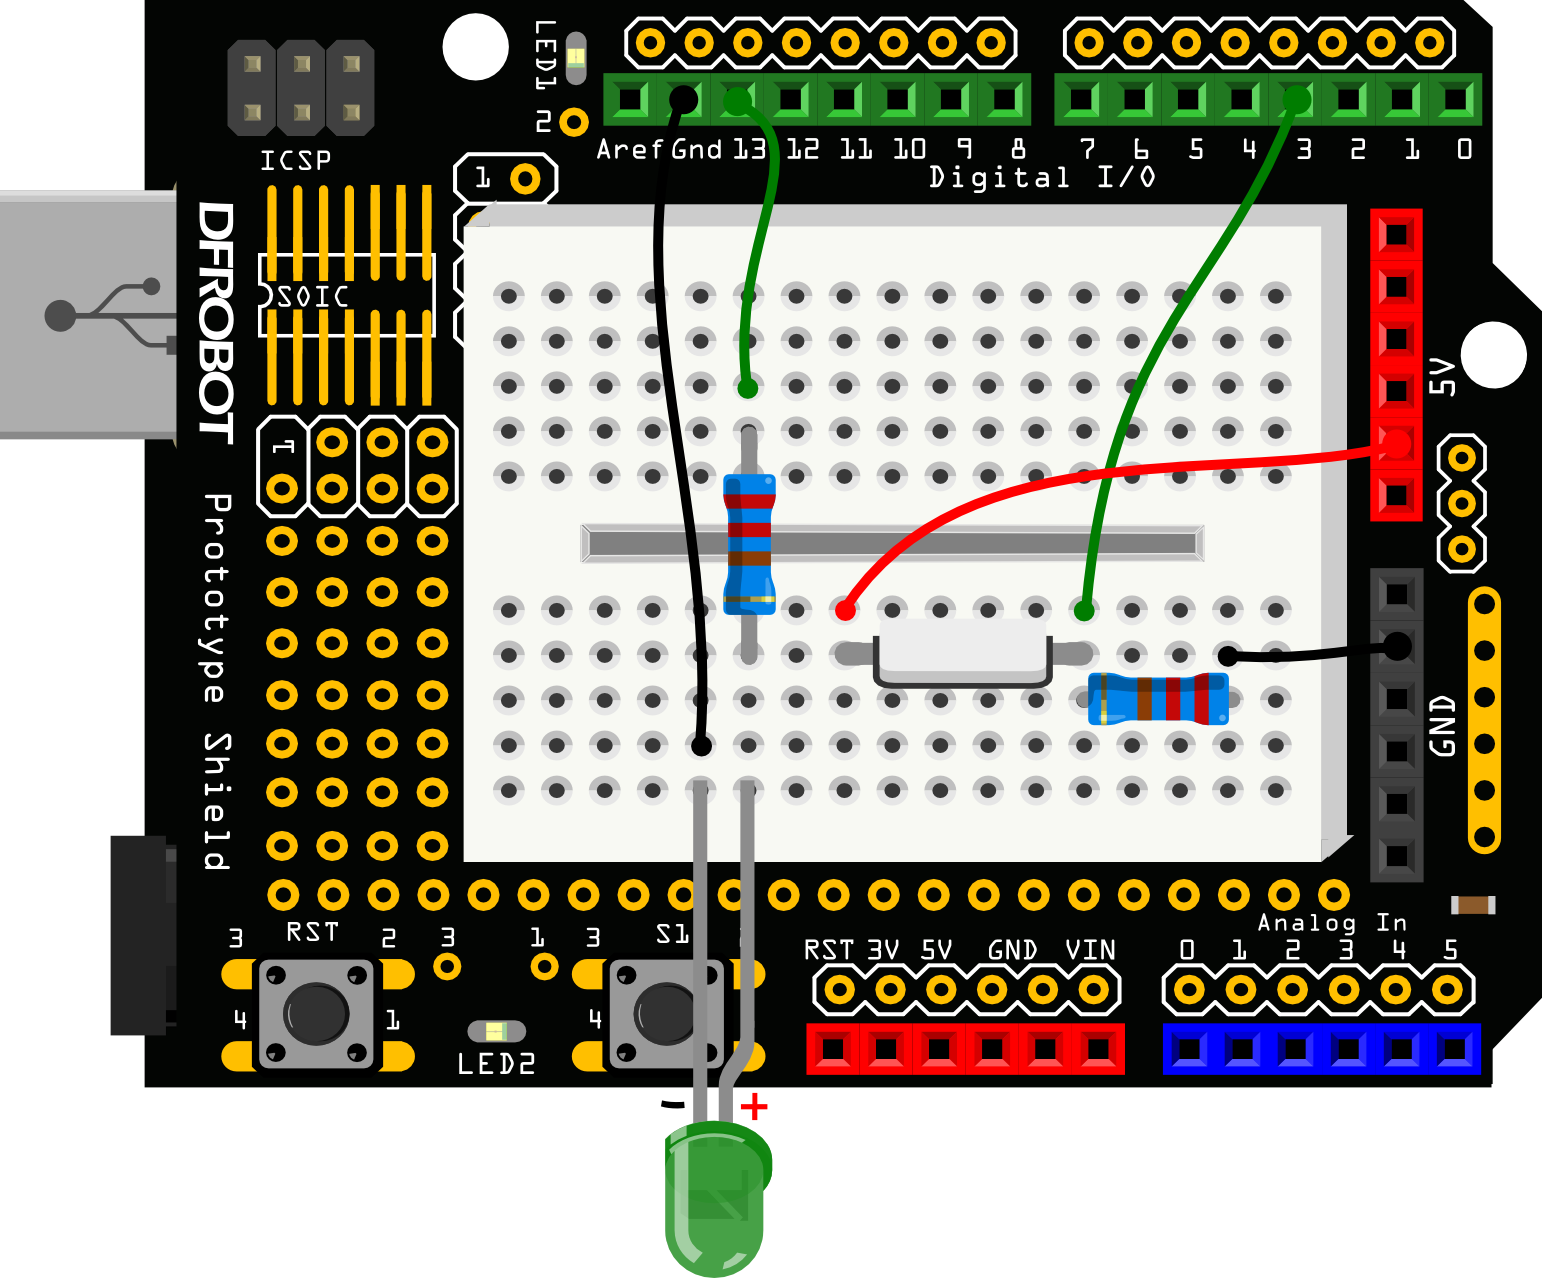
3.8 Arduino Tutorial : Detecting vibration
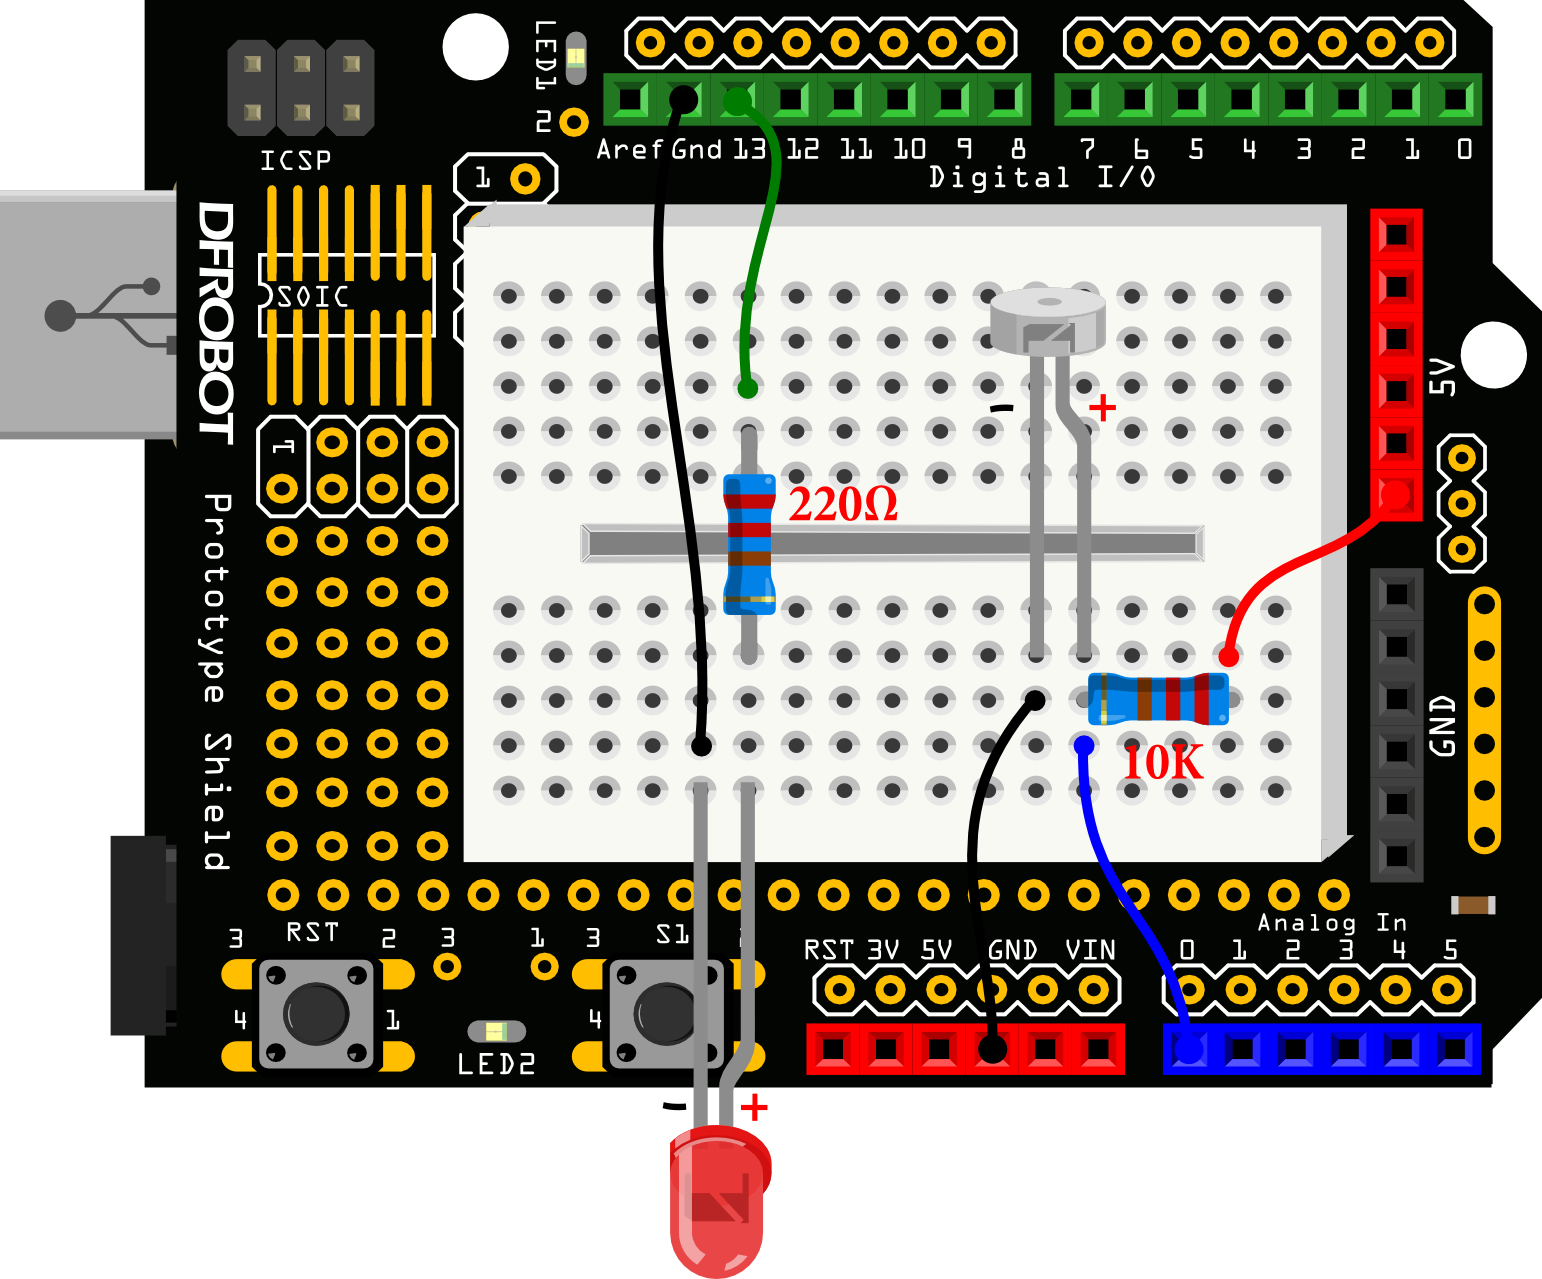
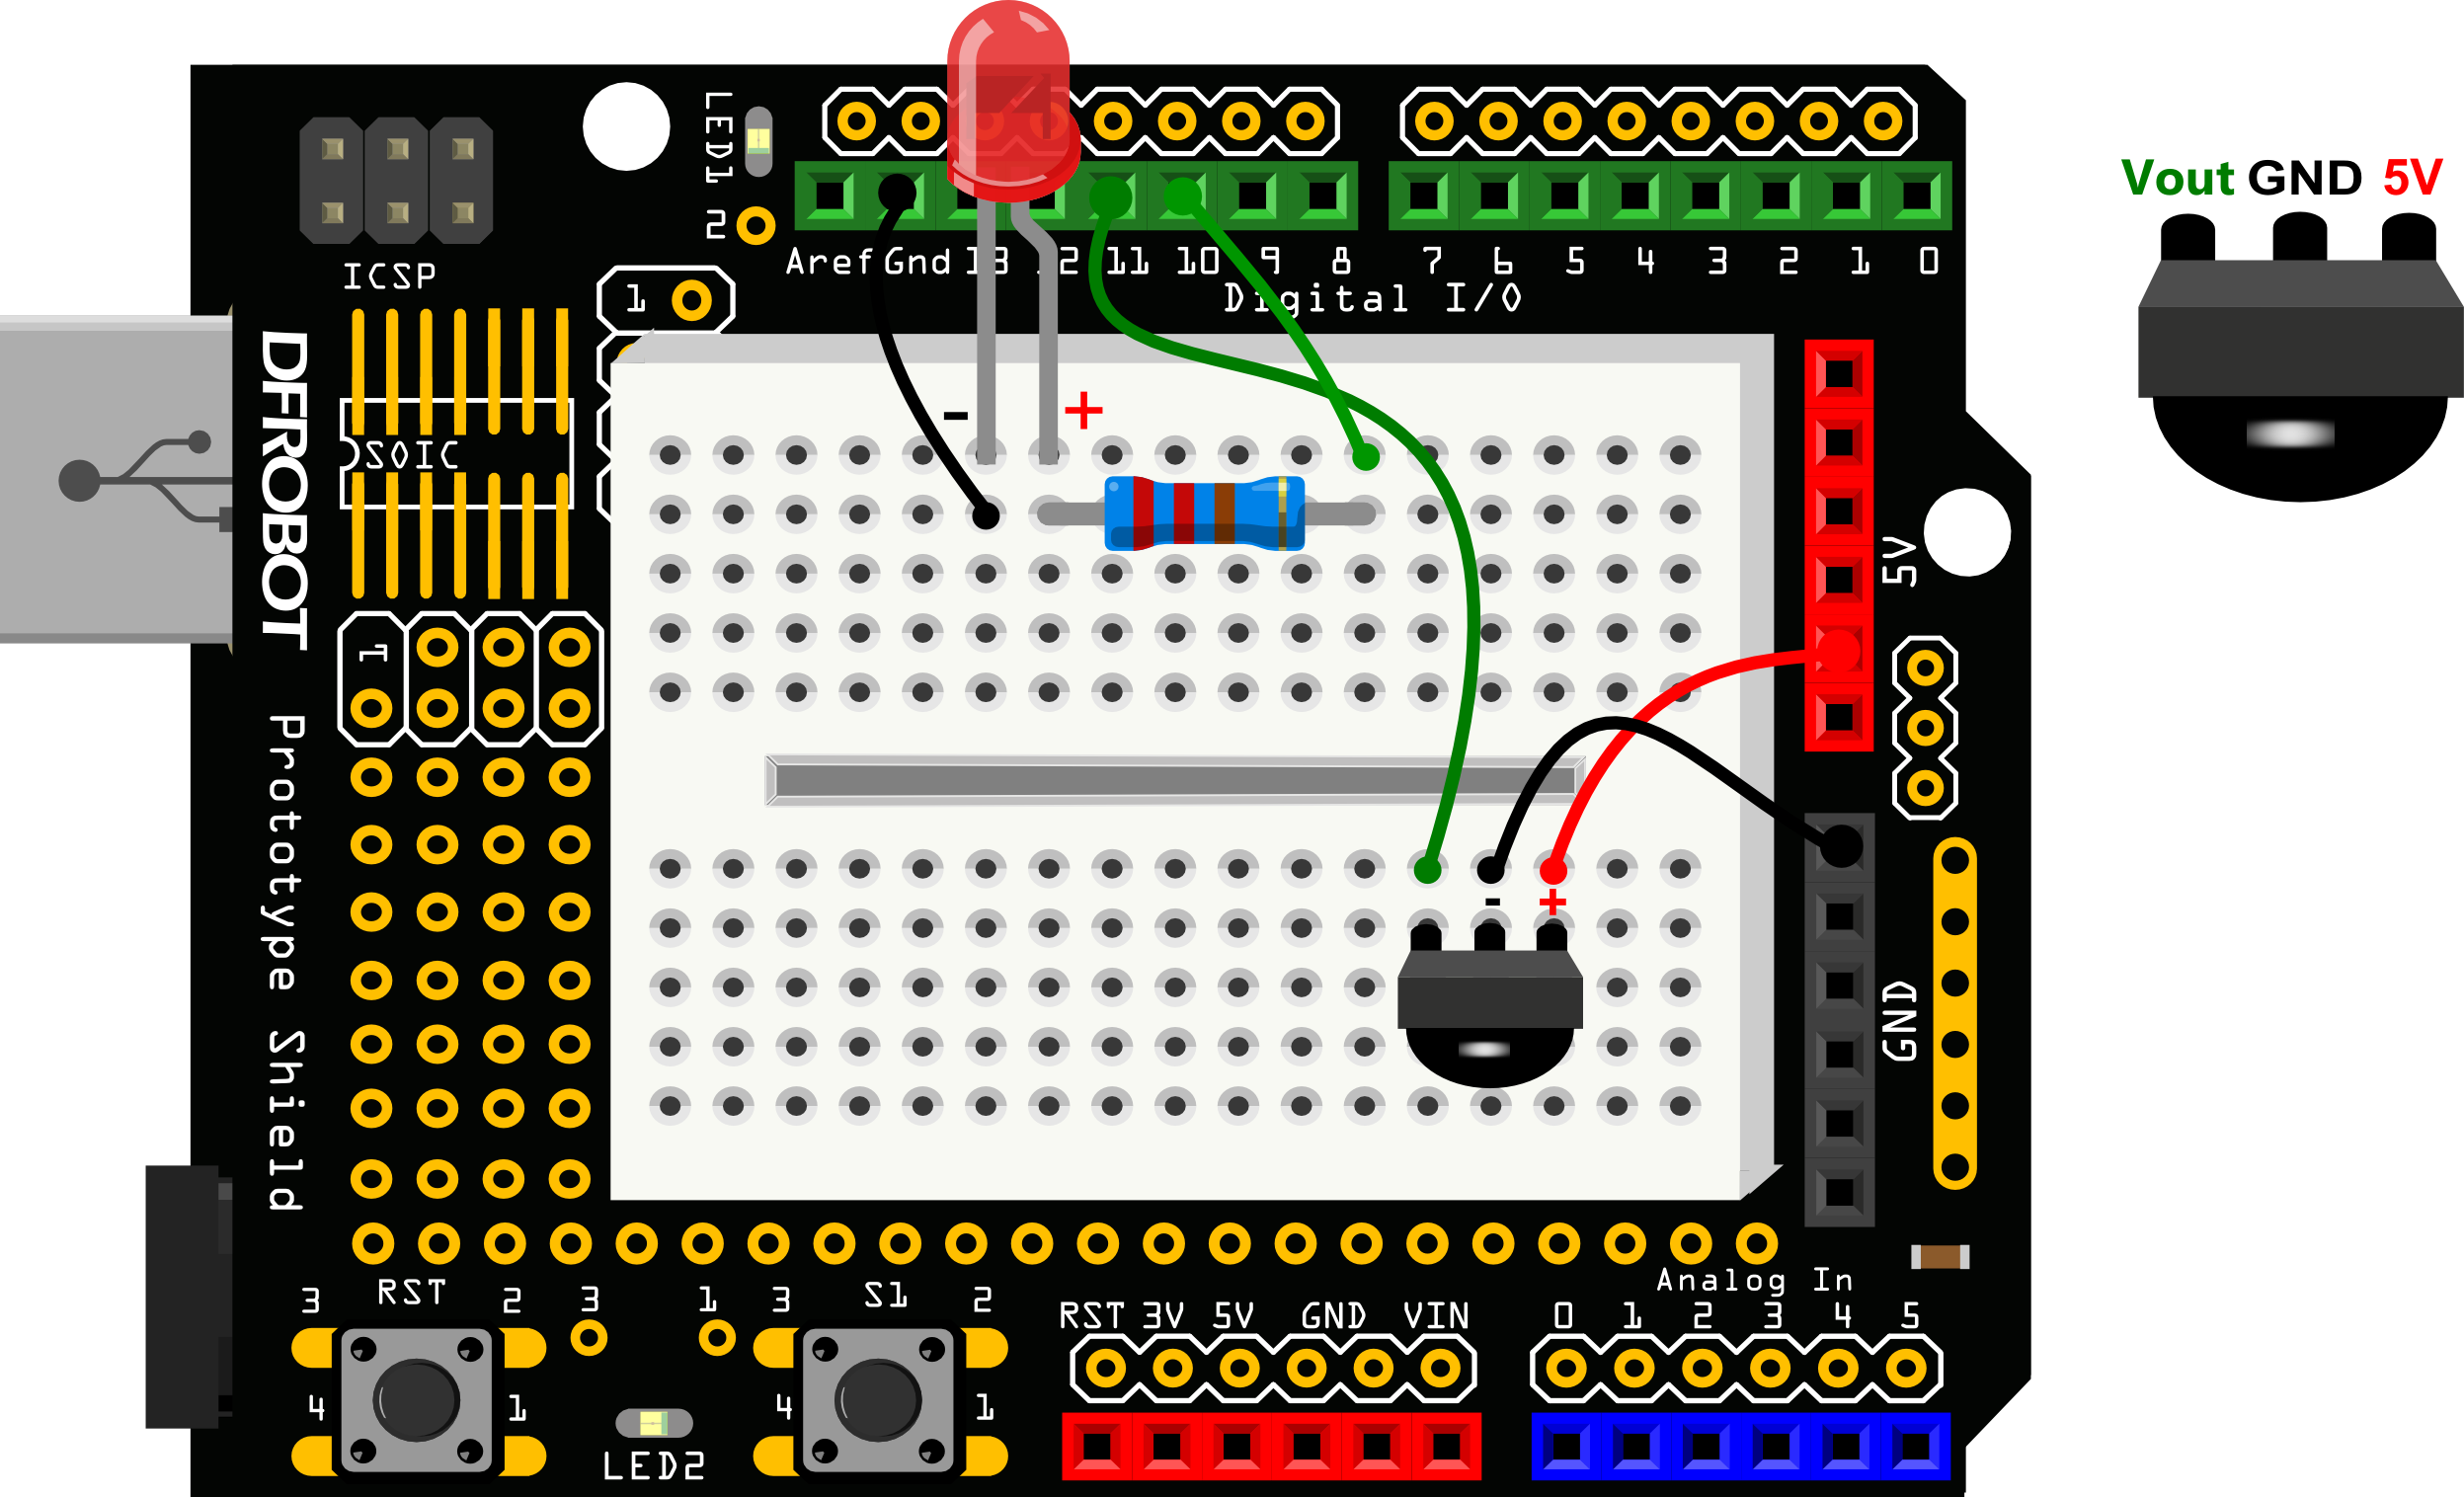
3.9 Arduino Tutorial : Ambient Light controlled LED
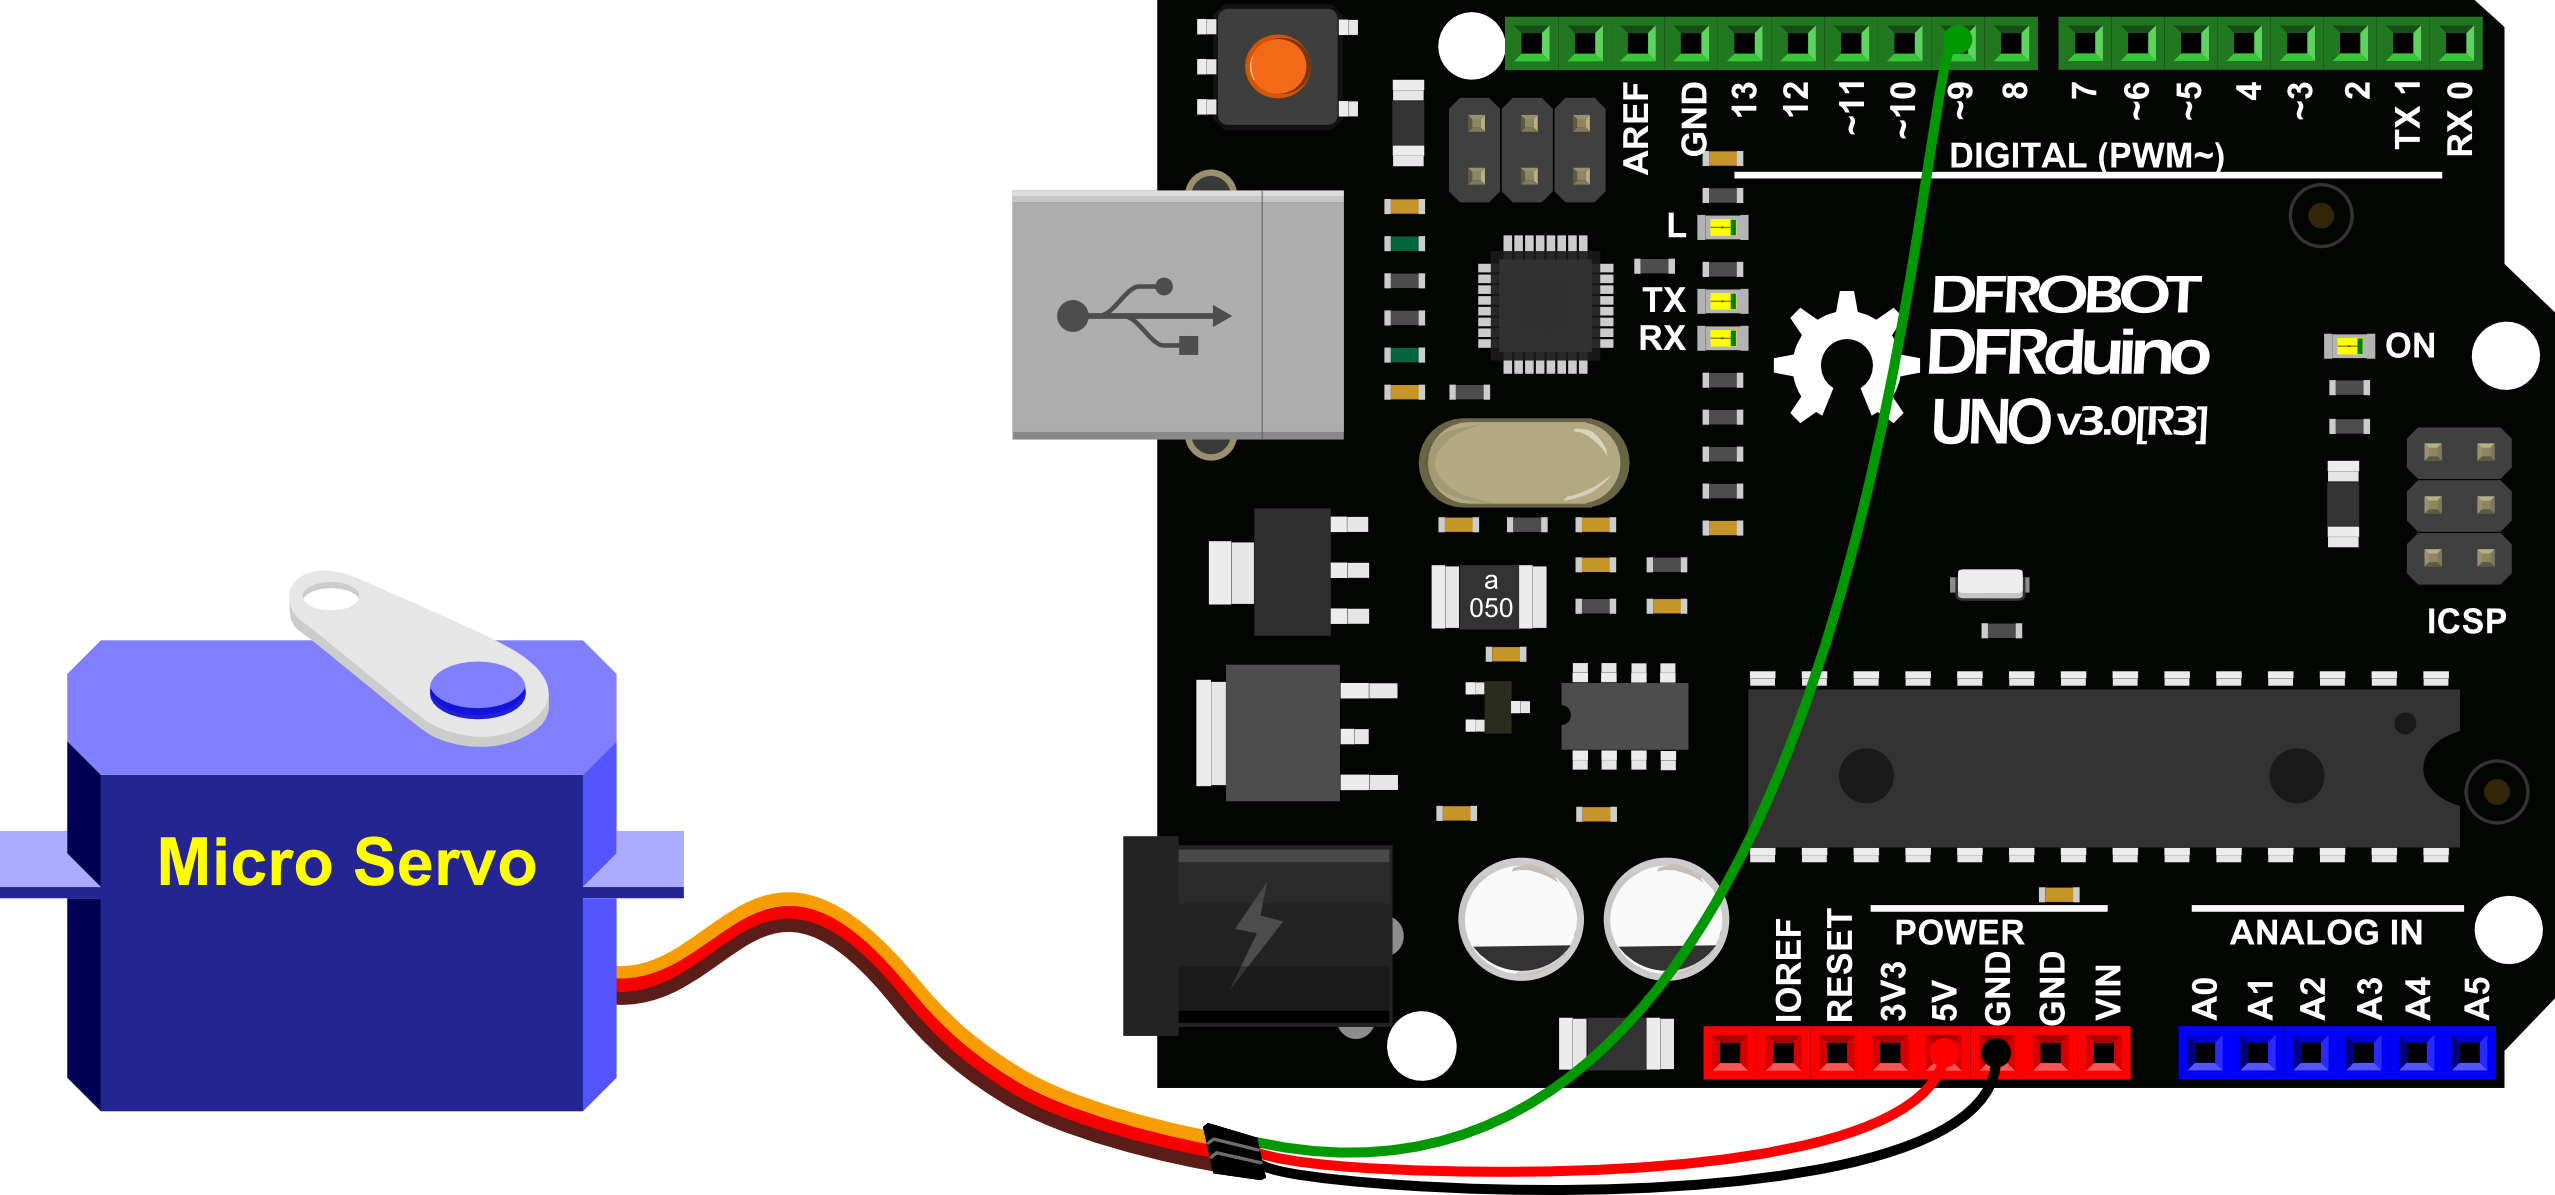
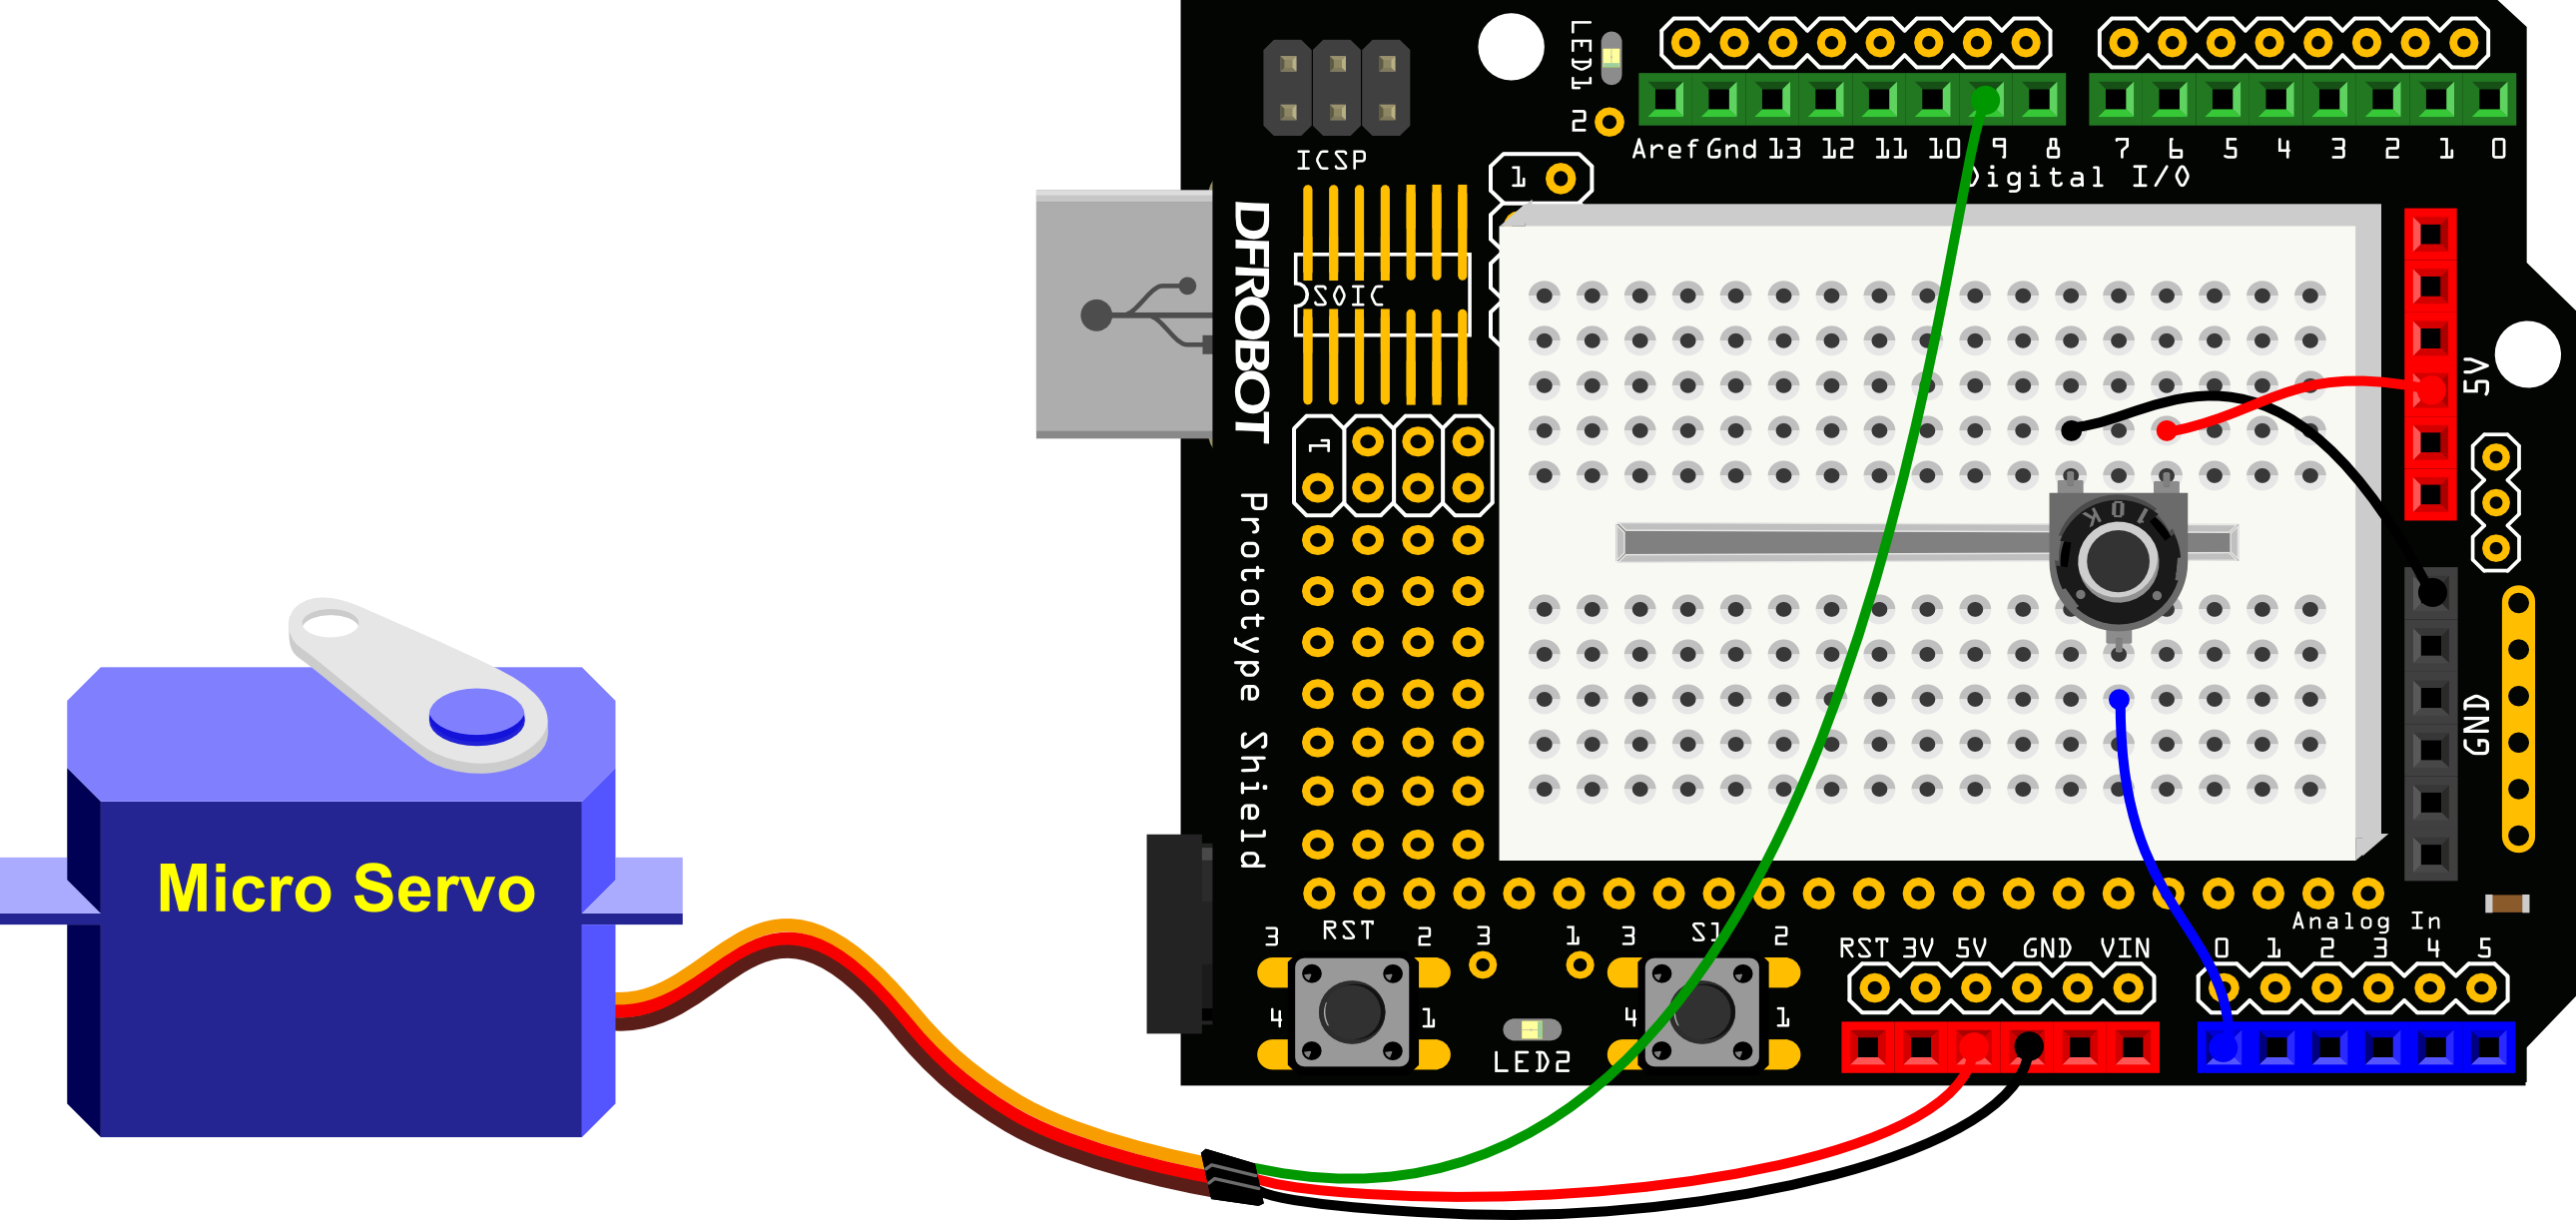
3.10 Arduino Tutorial : Moving a Servo
3.11 Arduino Tutorial : Interact with Servo
3.12 Arduino Tutorial : RGB Light Dimmer
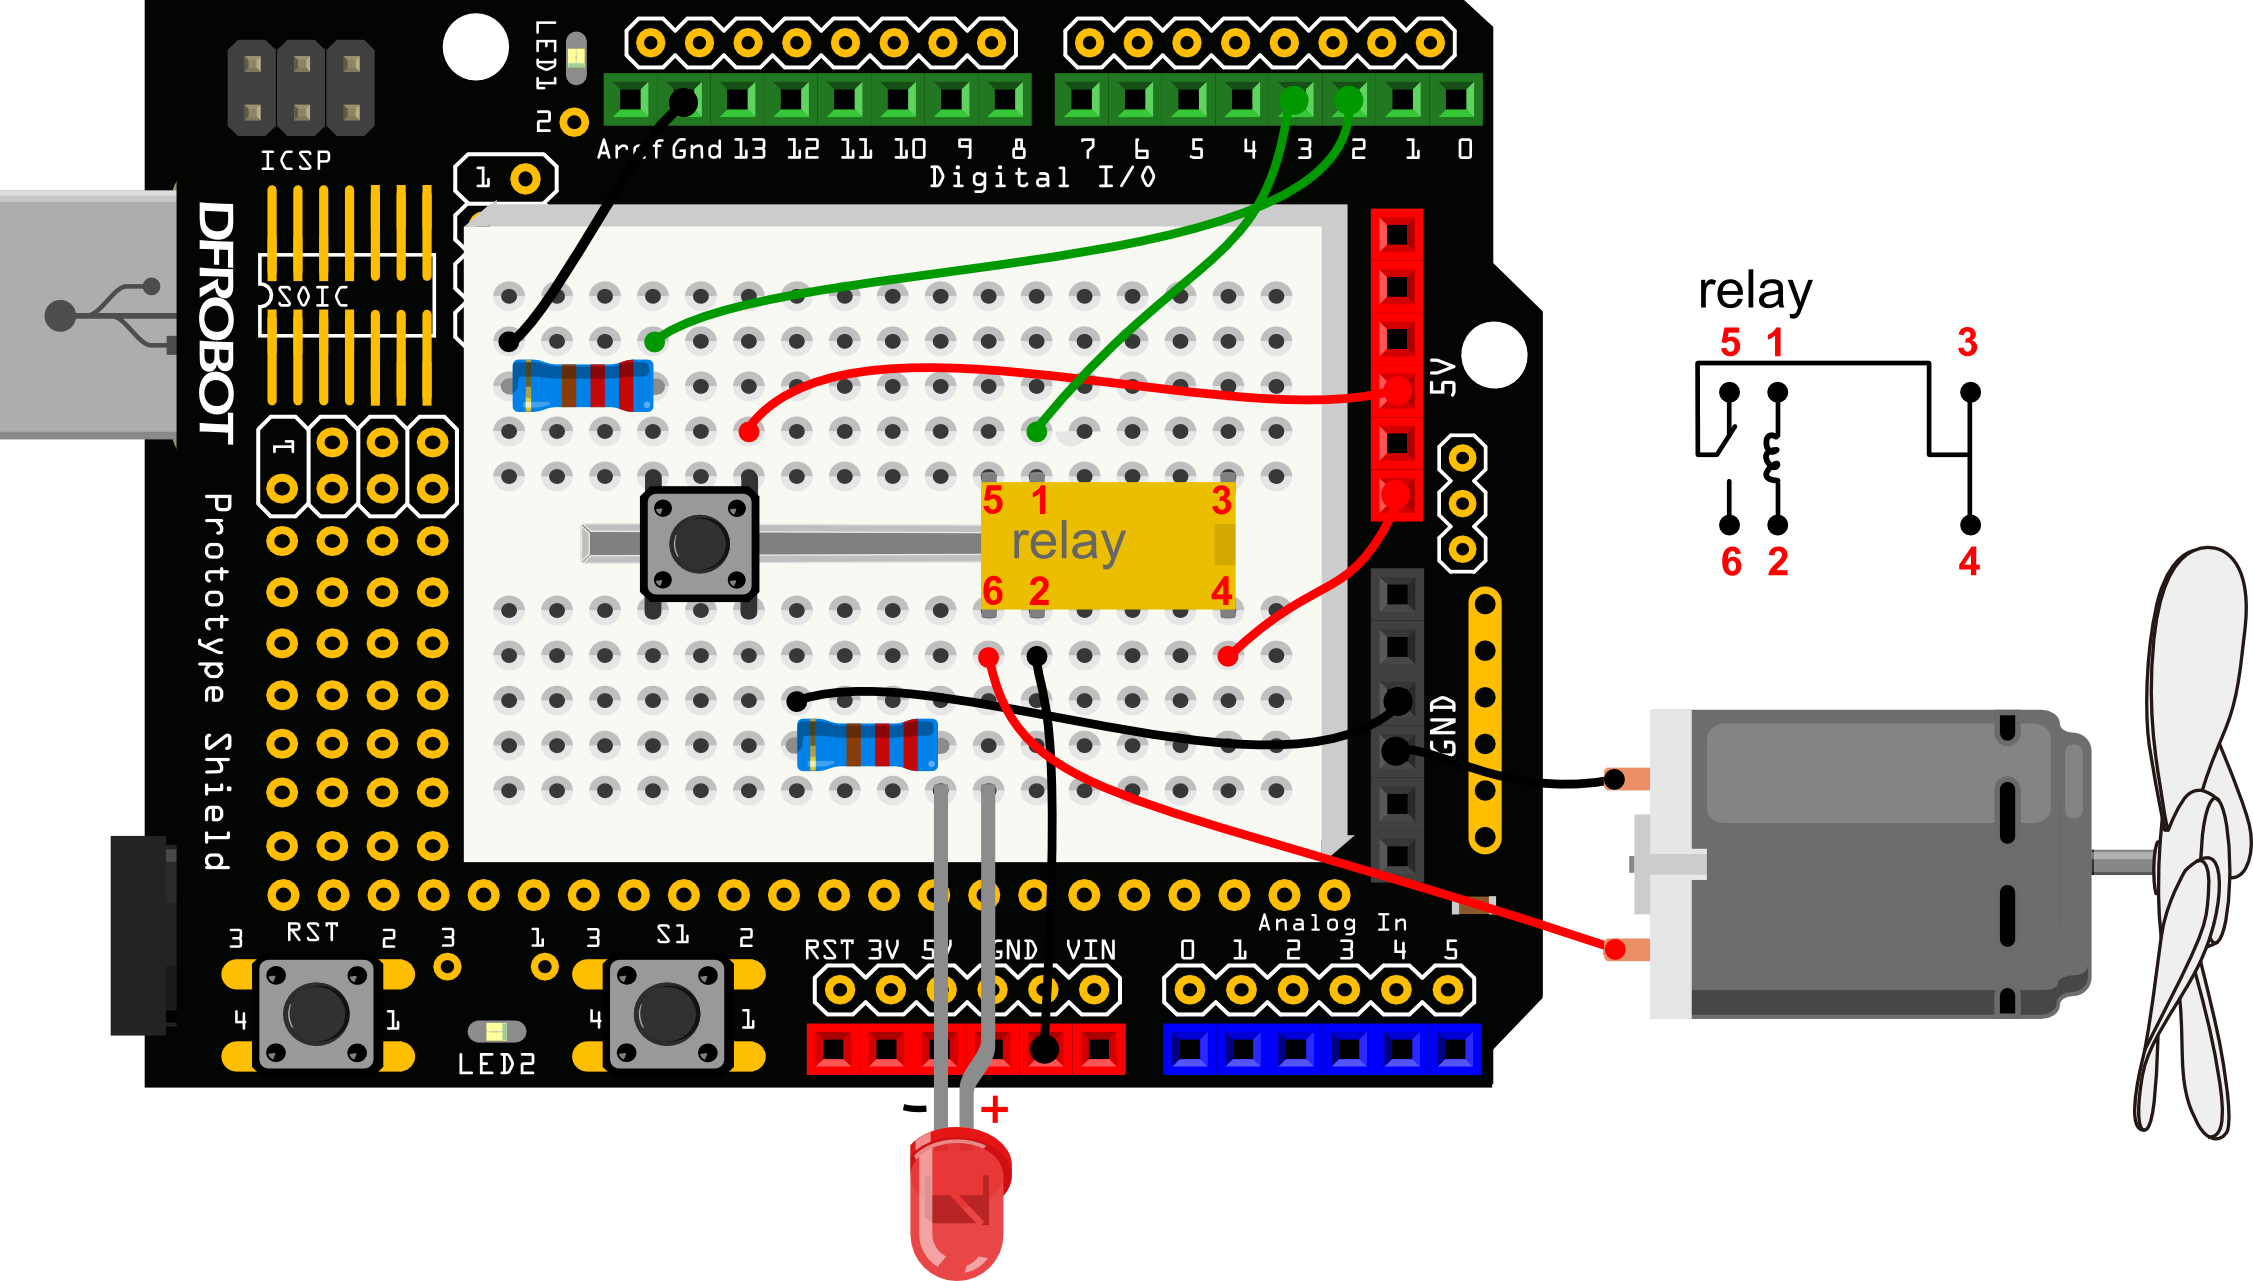
3.13 Arduino Tutorial : Motor Fan
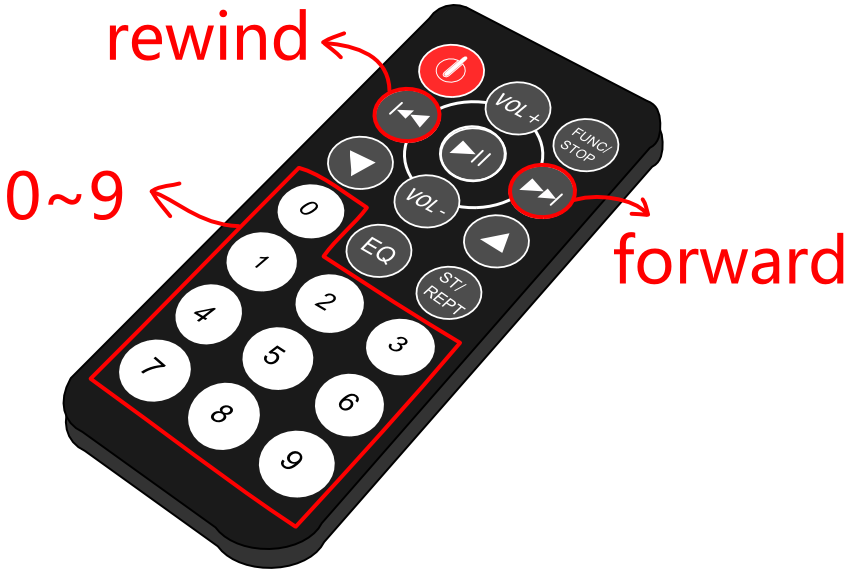
3.14 Arduino Tutorial : Infrared controlled Light
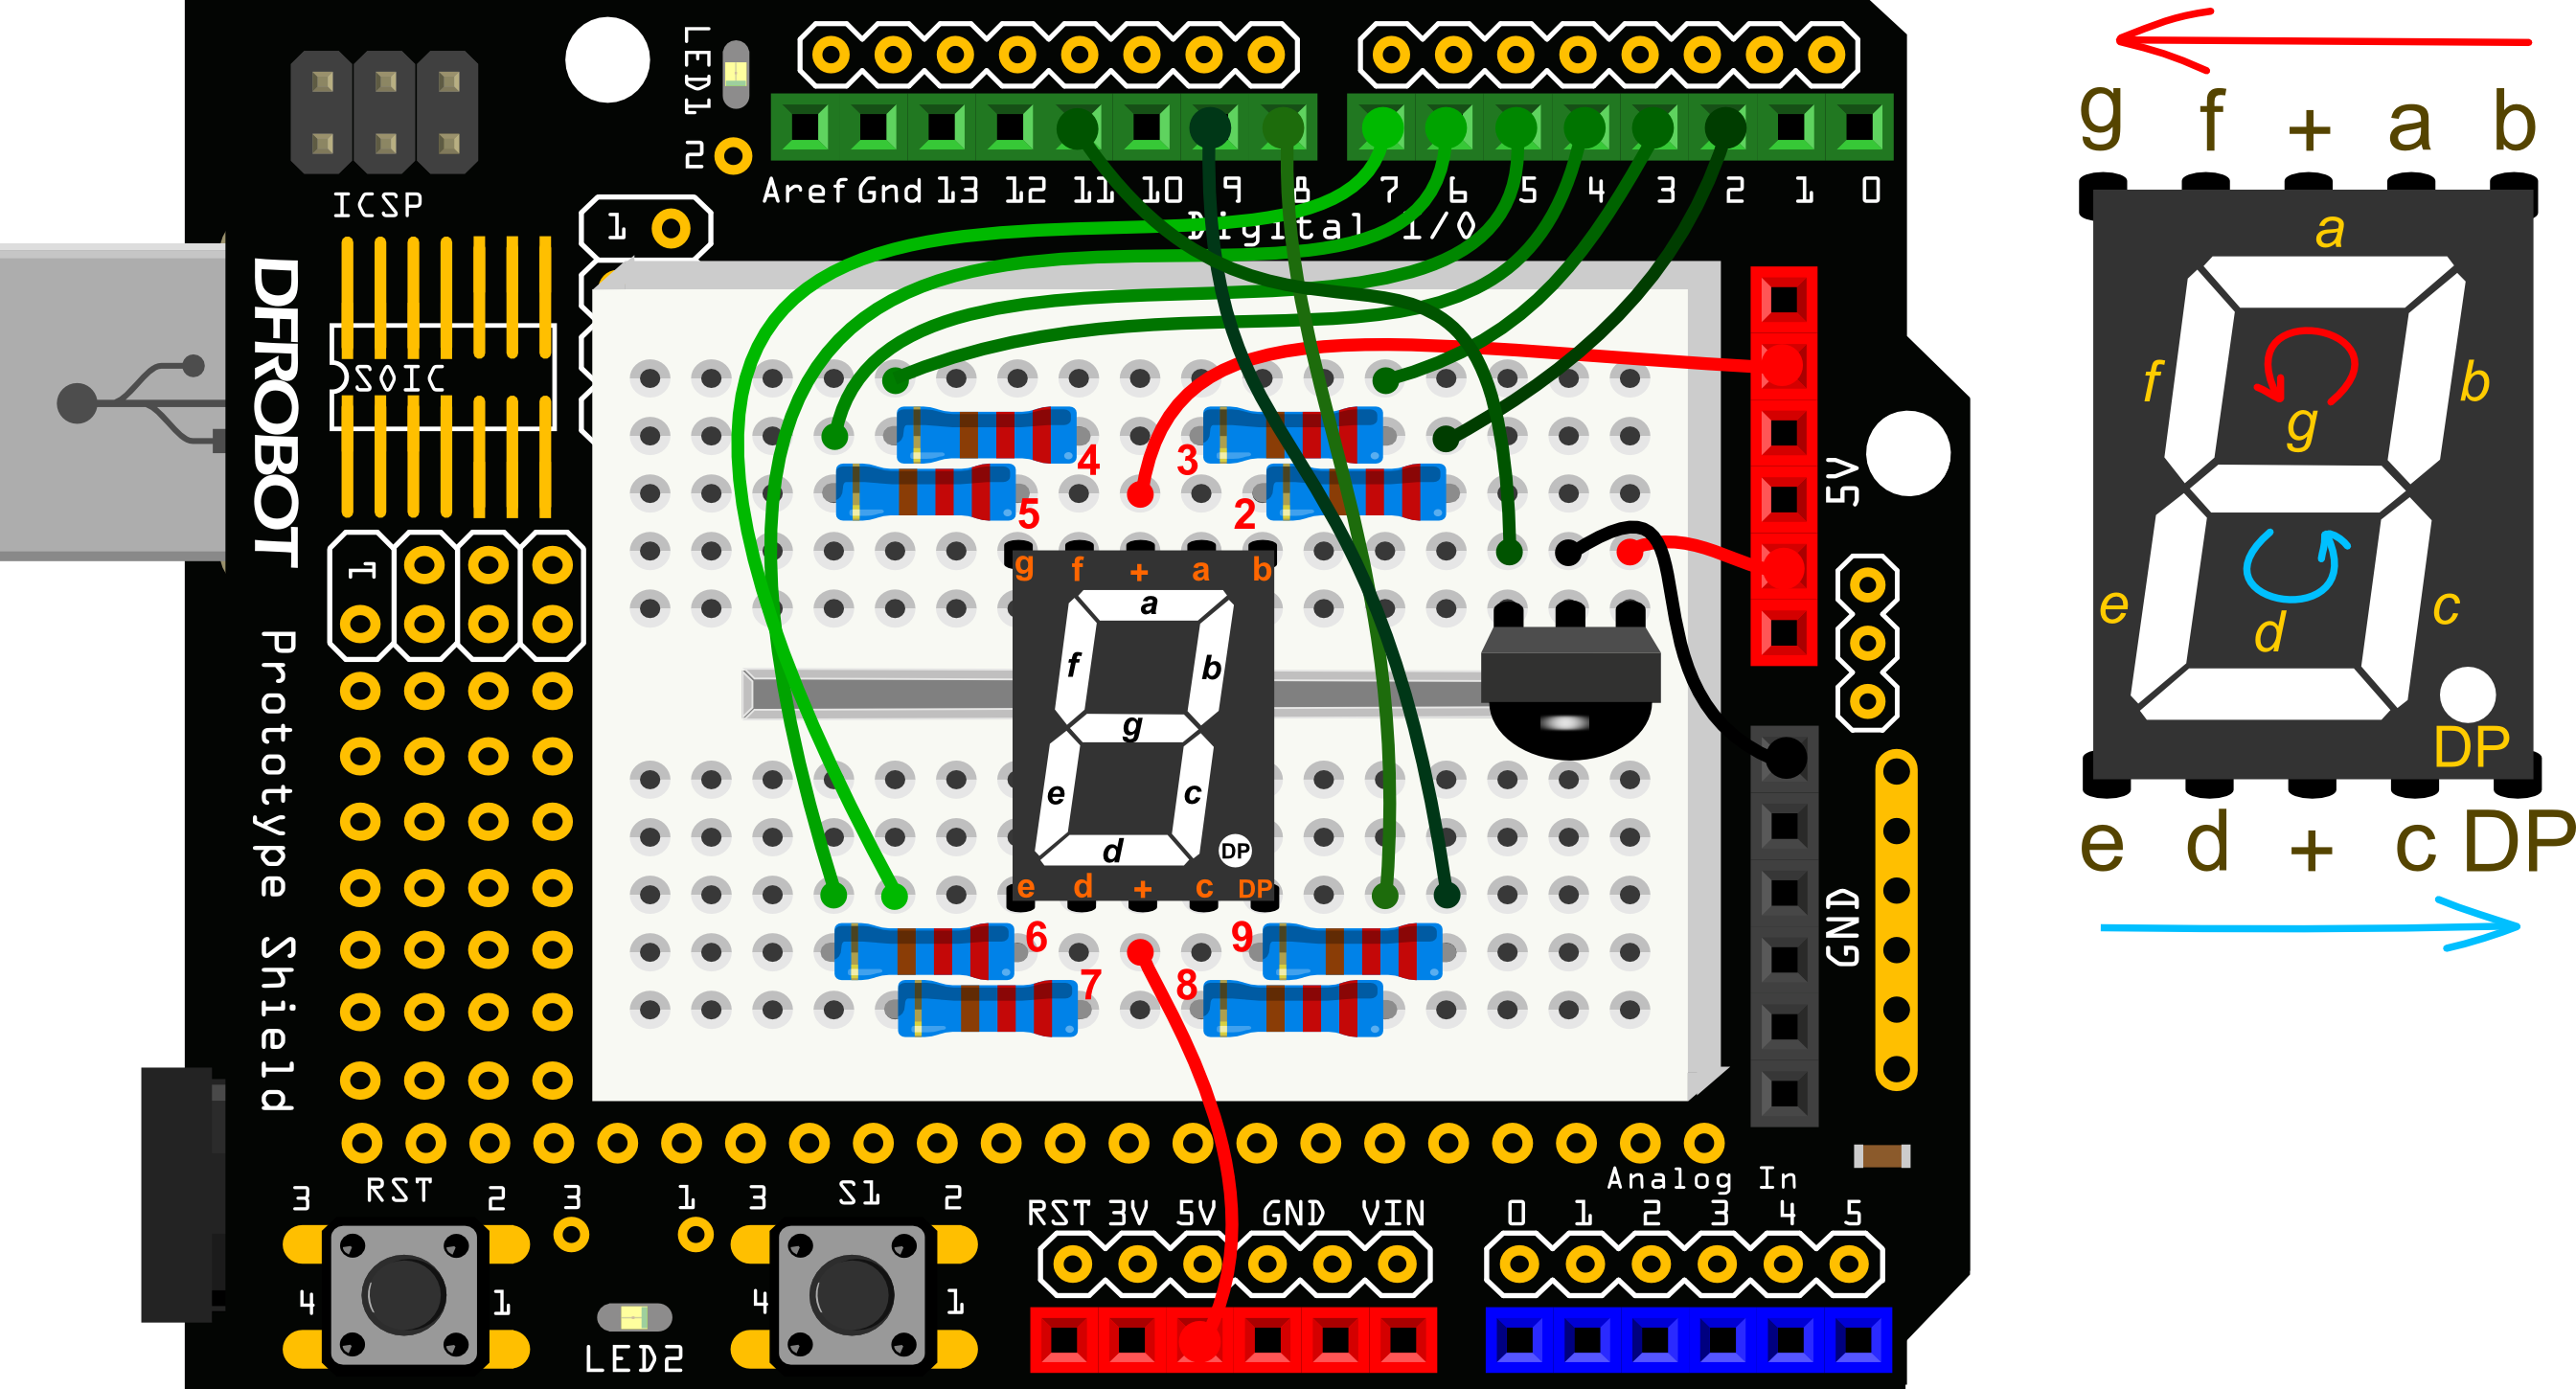
3.15 Arduino Tutorial : Infrared controlled LED Matrix
More Documents
- Old Version
- V2 wiki
- New Version
FAQ
| Q&A | Some general Arduino Problems/FAQ/Tips |
|---|---|
| Q | I have to say that I am loving the kit. I just wanted to let you know of an issue that I have encountered. In projects 11 and 12 of the kit, it requires the use of the 3 potentiometers. The problem is that the terminals of the potentiometers do not fit across into the sockets on the Prototyping Shield nor the provided breadboard. They are to wide. |
| A | Hello, your feedback is very precious to us. Just as you said, the potentiometer couldn't be inserted to the hole easily, but with some strength to push it downward, it could be done. I've attached a picture about it. Btw, we will consider to upgrade it. |