How to Running YOLOv8 Object Detection Model on Unihiker Single Board Computer
This tutorial guides you through running YOLOv8 on the Unihiker, a next-gen open-source hardware platform designed for Python learning and usage. YOLOv8, the latest object detection model by Ultralytics, combines high accuracy and speed, making it ideal for real-time applications. However, its resource demands pose challenges on lightweight devices. The Unihiker, equipped with an RK3308 Arm 64-bit quad-core processor, provides a compact, cost-effective solution for deploying YOLOv8. You'll learn to set up the environment, install necessary libraries, and optimize performance by converting the model to ONNX format. This project is perfect for those seeking practical experience in embedded systems and AI.
1. Introduction
1.1 yolov8
As object detection technology continues to expand into various fields, more industrial and commercial users are turning to YOLO for real-time detection, object tracking, and other applications. In 2023, Ultralytics released YOLOv8, which has attracted significant attention. YOLOv8 offers higher detection accuracy and speed but requires substantial computational resources, potentially causing lagging issues on lightweight computing devices. While high-performance computers can meet YOLO's demands, they are often bulky and inconvenient for portability and deployment.
YOLOv8 (You Only Look Once version 8) is the latest version of the YOLO object detection model launched by Ultralytics. It has the following features:
- 1. High Accuracy and Speed: YOLOv8 enhances detection speed while maintaining high accuracy, making it ideal for real-time applications.
- 2. Multi-task Support: Besides object detection, YOLOv8 also supports object classification, semantic segmentation, and other tasks.
- 3. Lightweight Design: Although it requires considerable computational resources, optimization and acceleration techniques enable efficient operation on embedded devices.
YOLOv8 is widely used in fields such as intelligent security, autonomous driving, industrial inspection, and medical image analysis, significantly boosting automation and intelligence levels in these areas.
1.2 Introduction to Unihiker Hardware
The Unihiker is a next-generation, domestically-produced open-source hardware platform specifically designed for Python learning and usage. It features a single-board computer architecture with an integrated LCD color screen, WiFi, Bluetooth, various common sensors, and numerous expansion interfaces. It also comes with a built-in Linux operating system and Python environment, pre-installed with commonly used Python libraries, making it easy for teachers and students to conduct Python teaching with just two simple steps.

The Unihiker is based on the RK3308 Arm 64-bit quad-core processor, with a main frequency of up to 1.2GHz. It is equipped with 512MB DDR3 memory and a 16GB eMMC hard drive, running the Debian 10 operating system. It supports 2.4G Wi-Fi and Bluetooth 4.0, utilizing the RTL8723DS chip. The Unihiker also integrates a GD32VF103C8T6 RISC-V coprocessor, with a main frequency of 108MHz, 64KB Flash, and 32KB SRAM.
The Unihiker includes various onboard components such as a Home button, A/B buttons, and a 2.8-inch touch-enabled color screen with a resolution of 240x320. The device also features a capacitive silicon microphone, a PT0603 phototransistor light sensor, a passive buzzer, and a blue LED. Additionally, it has an ICM20689 six-axis sensor, which includes a three-axis accelerometer and a three-axis gyroscope.
In terms of interfaces, the Unihiker offers multiple connectivity options. It has a USB Type-C interface for connecting the CPU to a PC for programming or powering the main board. There is also a USB Type-A interface for connecting external USB devices. Moreover, the board includes a microSD card slot for expanding storage, a 3Pin I/O supporting three 10-bit PWM and two 12-bit ADC channels, an independent 4Pin I2C interface, and 19 independent I/O golden fingers compatible with micro:bit, supporting various communication protocols and functions.

1.3 Running YOLOv8 Object Detection on the Unihiker
In this article, we will use the Unihiker, developed by DFRobot, to run YOLOv8 and attempt to accelerate it by converting it to the ONNX format.
Deploying YOLOv8 on the Unihiker has significant practical and educational implications:
- 1. Portability and Deployment Flexibility: The Unihiker's compact form factor makes it easy to embed in space-constrained devices for portable object detection deployment. Compared to large computers, the Unihiker is more suitable for on-site and mobile scenarios.
- 2. Cost-Effectiveness: The Unihiker is relatively low-cost, making it suitable for budget-constrained projects and educational purposes. Running YOLOv8 on the Unihiker allows for low-cost object detection application development and experimentation.
- 3. Learning and Experimentation Platform: The Unihiker offers a rich set of interfaces and onboard components, making it an ideal platform for learning and experimentation. By running YOLOv8 on the Unihiker, students and developers can gain a deeper understanding of the integration of embedded systems and artificial intelligence, and learn to apply optimization and acceleration algorithms in resource-constrained environments.
- 4. Technical Challenges and Innovation: Running YOLOv8 on the resource-limited Unihiker requires overcoming challenges related to computational performance and memory limitations. This provides developers with an opportunity to explore and innovate by trying various optimization techniques, such as model compression, quantization, and hardware acceleration.
2. Preparation: Environment Setup for Running YOLOv8
To successfully run YOLOv8 on the Unihiker, we will use the library provided by Ultralytics for deployment. First, we need to ensure that the Python environment on the Unihiker meets the requirements for YOLOv8, specifically that the Python version is upgraded to 3.8 or higher. We recommend using MiniConda for version management, as it allows for easy switching and management of different Python environments.
The general steps are as follows:
- 1. Install MiniConda: First, download and install MiniConda on the Unihiker. MiniConda is a lightweight Python distribution designed to simplify the management of Python environments and package installations.
- 2. Create a New Environment: Use MiniConda to create a new virtual environment with Python 3.8 or higher. This ensures compatibility by isolating the YOLOv8 deployment from the system's default Python environment.
- 3. Activate the Environment: Activate the newly created virtual environment to make it the current working environment.
- 4. Install the Ultralytics Library: In the activated virtual environment, use the pip command to install the official YOLO library provided by Ultralytics. This will download and install all necessary dependencies and components, allowing us to run YOLOv8 smoothly.
Following these steps, we can successfully deploy YOLOv8 on the Unihiker, leveraging its powerful object detection capabilities. This method ensures efficient operation of YOLOv8 and facilitates environment management and version control, providing a stable foundation for subsequent development and experimentation. Additionally, using MiniConda for version management allows us to flexibly meet different project requirements for Python environments, enhancing development efficiency.
Here are the detailed steps:
Step 1: Check the Current Python Version
In the terminal, input:
python --version
The terminal should display:
Python 3.7.3
Since Ultralytics does not support lower Python versions, we need to upgrade Python. We choose to use MiniConda for version management and upgrading.
Note: Do not use Anaconda as it may cause errors on the Unihiker.
Since Ultralytics does not support lower Python versions, we need to upgrade Python. We choose to use MiniConda for version management and upgrading.
Note: Do not use Anaconda as it may cause errors on the Unihiker.
Step 2: Download MiniConda
In the terminal, input:
wget https://github.com/conda-forge/miniforge/releases/latest/download/Miniforge3-Linux-aarch64.sh After downloading, the terminal should display:
Saved “Miniforge3-Linux-aarch64.sh” [74300552/74300552])
Step 3: Install MiniConda
In the terminal, input:
sudo bash Miniforge3-Linux-aarch64.shFollow the prompts to press the ENTER key or type yes as needed. Finally, the terminal should display:
Added mamba to /root/.bashrc==> For changes to take effect, close and re-open your current shell. <==Thank you for installing Miniforge3!

In the terminal, input:
source ~/.bashrcWhen the installation is complete, input:
condaTerminal display

Step 4: Activate Conda
In the terminal, input:
conda activateYou should see the terminal display:
root@unihiker:
Change to
(base) root@unihiker:~
You have successfully activated conda
Step 5: Create a YOLO Environment in Conda
Name the environment yolo and select Python version 3.11. In the terminal, input:
conda create -n yolo python=3.11During the process, the terminal will display:

Input y to proceed. After setting up the environment, the terminal will display:

Step 6: Activate the yolo environment
In the terminal, input:
conda activate yoloYou should see the terminal display:
root@unihiker:
Change to
(base) root@unihiker:~
You have successfully activated conda
Step 7: Install utralytics
In the terminal, input:
pip install ultralyticsAfter completion, the terminal displays:
![]()
Step 8: Install Pillow
In the terminal, input:
pip install pillowIf installed, the terminal displays:
Requirement already satisfied: pillow in /root/miniforge3/envs/yolo/lib/python3.11/site-packages (10.3.0)
Step 9 Install OpenCV
In the terminal, input:
pip install opencv-pythonIf installed, the terminal displays:
Requirement already satisfied: opencv-python in /root/miniforge3/envs/yolo/lib/python3.11/site-packages (4.9.0.80)Requirement already satisfied: numpy>=1.21.2 in /root/miniforge3/envs/yolo/lib/python3.11/site-packages (from opencv-python) (1.26.4)
3. Quick Start: Running Native YOLOv8
The YOLOv8 object detection model comes in five variants, all trained on the COCO dataset. The suffixes and corresponding model performance are as follows:
n: Nano (ultra-lightweight)
s: Small
m: Medium
l: Large
x: Extra Large
Each model variant offers a balance between performance and computational requirements, allowing you to choose the one that best fits your specific needs and available resources.
| Models | Size (pixel) | mAPval 50-95 | Speed - CPUONNX(ms) | Speed - A100 TensorRT(ms) | params (M) | FLOPs (B) |
| YOLOv8n | 640 | 37.3 | 80.4 | 0.99 | 3.2 | 8.7 |
| YOLOv8s | 640 | 44.9 | 128.4 | 1.2 | 11.2 | 28.6 |
| YOLOv8m | 640 | 50.2 | 234.7 | 1.83 | 25.9 | 78.9 |
| YOLOv8l | 640 | 52.9 | 375.2 | 2.39 | 43.7 | 165.2 |
| YOLOv8x | 640 | 53.9 | 479.1 | 3.53 | 68.2 | 257.8 |
Due to the limited performance of the Unihiker, we will only use the native YOLOv8n for image object detection tasks. YOLOv8n is the lightest model in the YOLOv8 series, capable of performing object detection tasks with lower computational resources and faster speed while maintaining accuracy, making it very suitable for resource-constrained application scenarios.
Below are the specific steps:
Step 1: Create and Enter the yolo Directory
In the terminal, input:
mkdir yolo
cd yolo
Step 2: Create a Python File
Create a file named quick_start.py
Sample code:
Python
from ultralytics import YOLO

# Load a pretrained YOLO model (recommended for training)
model = YOLO("yolov8n.pt")

# Perform object detection on an image using the model
results = model("https://ultralytics.com/images/bus.jpg")

# Save results to disk
results[0].save(filename=f"result_bus.jpg")
Step 3: Ensure the YOLO Environment is Activated
In the terminal, input:
conda activate yoloYou should see the terminal display:
(yolo) root@unihiker:~/yolo#
Step 4: Run the Python Script
In the terminal, input:
python quick_start.pyYou should see the terminal display:

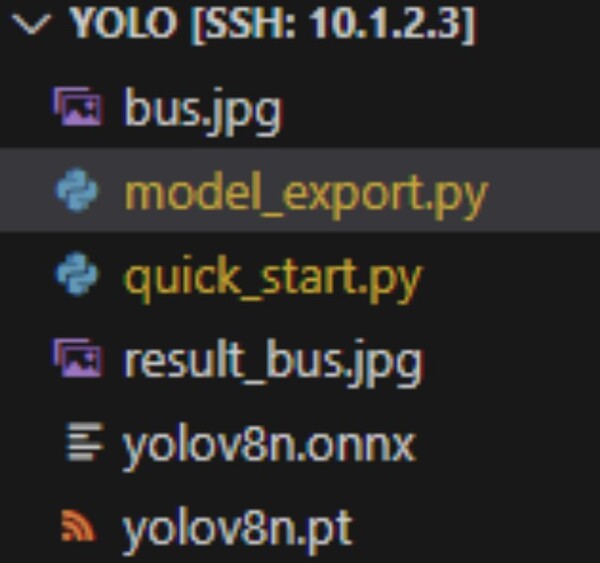
Using the native YOLOv8n model for inference on a single image takes approximately 27 seconds, which is relatively slow. At this point, several new files have appeared in our directory:

You can see that Ultralytics automatically downloaded yolov8n.pt, which is the weight file for YOLOv8n. It also downloaded the image bus.jpg, which is the picture we prepared for YOLO inference, as shown below:

Finally model inferenced, storing the results as result_bus.jpg:

4. Optimization: Converting to ONNX Format
When running the native YOLOv8n, the speed is very slow, so we need to convert its format to accelerate its performance. This section describes how to convert yolov8n.pt to ONNX format to speed up execution. Below are the detailed steps:
Step 1: Move to the yolo directory created in the previous section
In the terminal, input:
cd yoloStep 2: Create a Python file named export_onnx.py, with the following code:
Python
from ultralytics import YOLO

# Load a model
model = YOLO("yolov8n.pt")

# load an official model
# Export the model
model.export(format="onnx")
Step 3: Ensure the YOLO environment is activated
In the terminal, input:
conda activate yoloYou should see the terminal display change to:
(yolo) root@unihiker:~/yolo#
Step 4: Run the python script you wrote
In the terminal, input:
python export_onnx.pyYou should see the terminal display:

As you can see, to convert formats, you need to install the ONNX library, which Ultralytics does automatically. Finally, the converted file is automatically saved as yolov8n.onnx:

Step 5: Write the files that run the onnx model
Create the predict_onnx.py file and write the following code:
Python
from ultralytics import YOLO

# Load the exported NCNN model
onnx_model = YOLO("yolov8n.onnx", task = 'detect')

# Run inference
results = onnx_model("https://ultralytics.com/images/bus.jpg")

# Save results to disk
results[0].save(filename=f"result_bus_onnx.jpg")
Step 6: Run inference code
In the terminal, input:
python predict_onnx.pyYou should see the terminal display:

Prediction results are generated in the directory:

As you can see, object detection with the onnx model takes about 20 seconds, which is 7 seconds faster than the native model.
5. Further optimization: Reduce the size of the input image
It can be seen that the current inference speed is still slow.
If you want to increase the speed of inference, you can reduce the size of the input image. When exporting the ONNX model, we can set the parameter imgsz to specify the size of the input image. If the size of the input image is uncertain, we can also set the dynamic parameter to True. In this case, the exported ONNX model can accept any size of the image input for inference. The specific steps are as follows:
Step 1: Move to the yolo directory created in the previous section
In the terminal, input:
cd yoloStep 2: Create a python file called export_onnx.py with the following code
Python
from ultralytics import YOLO

# Load a model
model = YOLO("yolov8n.pt")  # load an official model

# Export the model
model.export(format="onnx", dynamic = True)
Step 3: Confirm the yolo environment is Activated
In the terminal, input:
conda activate yoloYou should see the terminal display: (yolo) root@unihiker:~/yolo#
Step 4: Run the python script
In the terminal, input:
python export_onnx.pyYou should see the terminal display:

As you can see, to convert formats, you need to install the ONNX library, which Ultralytics does automatically. Finally, the converted file is automatically saved as yolov8n.onnx:
Step 5: Write the files that run the onnx model
Create the predict_onnx.py file and write the following code:
Python
from ultralytics import YOLO
import cv2

# Load the exported NCNN model
onnx_model = YOLO("yolov8n.onnx", task = 'detect')

image = cv2.imread('bus.jpg')
print(image.shape)

# Run inference
print('original')
results = onnx_model("bus.jpg")
results[0].save(filename='bus_640.jpg')
print(448)
results = onnx_model("bus.jpg", imgsz = 448)
results[0].save(filename='bus_448.jpg')
print(320)
results = onnx_model("bus.jpg", imgsz = 320)
results[0].save(filename='bus_320.jpg')
print(256)
results = onnx_model("bus.jpg", imgsz = 256)
results[0].save(filename='bus_256.jpg')
print(128)
results = onnx_model("bus.jpg", imgsz = 128)
results[0].save(filename='bus_128.jpg')
print(64)
results = onnx_model("bus.jpg", imgsz = 64)
results[0].save(filename='bus_64.jpg')
In this code, we test the operation of the raw size image, the 448 size image, the 320 size image, the 256 size image, the 128 size image, and the 64 size image.
Step 6: Run inference code
In the terminal, input:
python predict_onnx.pyYou should see the terminal display:

The size of the original image is 1080*810, and the maximum predicted size of the original yolov8n is 640, which takes about 22 seconds. The results are as follows:

If the input size is 448, it takes about 3.5 seconds. The results are as follows:

If the input size is 320, it takes about 2.2 seconds. The results are as follows:

If the input size is 256, it takes about 0.8 seconds. The results are as follows:

When the input size is 128, it takes about 0.4 seconds.

If the input size is 64, it takes about 0.1 seconds.

Be summarized as follows:
Notice: the performance tested on bus.jpg. Maybe you need more tests if you have your own dataset.
| Image size | Time consuming | Performance |
| 640 | 22s | Excellent |
| 448 | 3.5 | Excellent |
| 320 | 2.2 | Good |
| 256 | 0.8s | Good |
| 128 | 0.4s | Good |
| 64 | 0.1s | Bad |
Conclusion
As you can see, you can run yolov8n with simple code using the line board.
If you use the line board for image object detection, you can consider using 448 resolution input, in this case, the processing time of an image is about 3.5 seconds, and the performance is excellent.
If the line board is used for fast detection or vedio detection, limited to the computing power of the line board, it is recommended to use 128 resolution input, in this case, the processing time of an image is about 0.4 seconds.


Explore the new FireBeetle 2 ESP32-C5, a powerful IoT development board featuring dual-band 2.4/5GHz Wi-Fi 6, multi-protocol support (BLE, Zigbee, Thread), and integrated solar charging. See how it outperforms the ESP32-C6 for advanced, low-power projects.
REVIEWS ESP32
DFRobot showcases its revolutionary Unihiker K10 AIoT board at FAB25 Czechia with interactive workshops, free device trials, and exclusive maker gifts for attendees.
NEWS
The Selection guide comparing the FireBeetle (V1) and the FireBeetle 2 (V2) boards, particularly ESP32/ ESP8266 / Arduino versions.
SELECTION GUIDE ESP32ESP8266