PROJECTS LattePanda Use a LattePanda and Blynk to make a simple but cool IoT control unit.
Software apps and online services:
IoT stands for "Internet of things", which refers to the inter-networking of physical devices embedded with electronics, software, sensors, actuators, and network connectivity that enable these objects to communicate with each other.
The temperature in your house drops below a threshold, a temperature sensor registers this and activates the heating.
Intel "Cherrytrail" Quad-core 1.8GHz processor (Intel Atom z8350)
The second thing I will be using is Blynk - an app for creating IoT services. Blynk takes a lot of the development legwork out of developing IoT control interfaces. It can control hardware remotely, display sensor data, store data, visualize data and many other cool things besides.
Hardware:
Hardware Setup
1. Lift up the actuator
Next, connect to Wi-Fi:
1. When plugged in, you should see the red LED indicator lights up on the underside of the board. Wait patiently for a few seconds until the LED goes out.
Software Setup
Build a Smartphone Control App
Note: If your Arduino IDE is an older version, you may receive the following error: 'Blynk' was not declared in this scope.
cd C:\Program Files\Arduino\libraries\Blynk\scripts
Hit enter two times so that it looks like this.
I hope you had fun using Blynk and LattePanda. The LED example is very simple, but the concept can be developed to carry out larger applications. Try it yourself!
How to use LattePanda and Blynk to make a simple IoT Control Unit?
DFRobot
Apr 02 2018 261089
Use a LattePanda and Blynk to make a simple but cool IoT control unit.
Hardware components:
LattePanda
LED (generic)
Breadboard (generic)
Software apps and online services:
Blynk
STORY
IoT stands for "Internet of things", which refers to the inter-networking of physical devices embedded with electronics, software, sensors, actuators, and network connectivity that enable these objects to communicate with each other.
A few examples of IoT applications:
The temperature in your house drops below a threshold, a temperature sensor registers this and activates the heating.
Your plants need to be watered, a soil moisture sensor registers this and activates an automatic watering device.
A motion detector detects movement in a room, the lights in the room turn on.
Expect to hear about it a lot more about IoT in the years to come.
In this project I will be leveraging two cool new pieces of technology to build a simple but cool IoT control unit. This basic example will show you the tools necessary to create more complex IoT devices that you can use to automate your home!
The first cool innovation is LattePanda - an entire Windows 10 system on a single board. LattePanda ships with a full version of Windows 10 Home Edition pre installed. You can opt to buy it with a Windows activation key, or without if you'd like to install Linux, Android, etc. A few tech specs of the board:
Intel "Cherrytrail" Quad-core 1.8GHz processor (Intel Atom z8350)
WiFi 802.11 a/b/g (Realtek RTL8152B)
Bluetooth 4.0 (Realtek RTL8152B)
500Mhz Intel Gen 8 graphics processor
USB 2.0 x 2
USB 3.0 x 1
MIPI DSI (Custom pinout, connected via FPC with upgradable touch screen overlay)
HDMI out
2GB/4GB DDR3 RAM (as they offer two different versions)
If that's not enough for you, it also has an ATmega32u4 microcontroller integrated in to it (like you would find in an Arduino Leonardo) with accompanying GPIO. This makes it ideal for physical computing, IoT and embedded applications. The board runs of 5V@2A, powered either through a Micro USB or header pins and uses about 10W.
The second thing I will be using is Blynk - an app for creating IoT services. Blynk takes a lot of the development legwork out of developing IoT control interfaces. It can control hardware remotely, display sensor data, store data, visualize data and many other cool things besides.
Putting these two things together will enable me to use my smartphone to control an LED remotely over a network. Feel free to take this concept and develop it further to carry out lots of other cool things. Let's begin!
Hardware:
- LattePanda
- 7-inch 1024x600 IPS Display for LattePanda
- USB wireless keyboard and mouse
Hardware Setup
Ensure the board is powered off, and then connect the 7-inch 1024 x 600 IPS Display to the LattePanda via the integrated DSI connector.
1. Lift up the actuator
2. Insert the display's FPC cable with the contacts faced downward
3. Secure the actuator
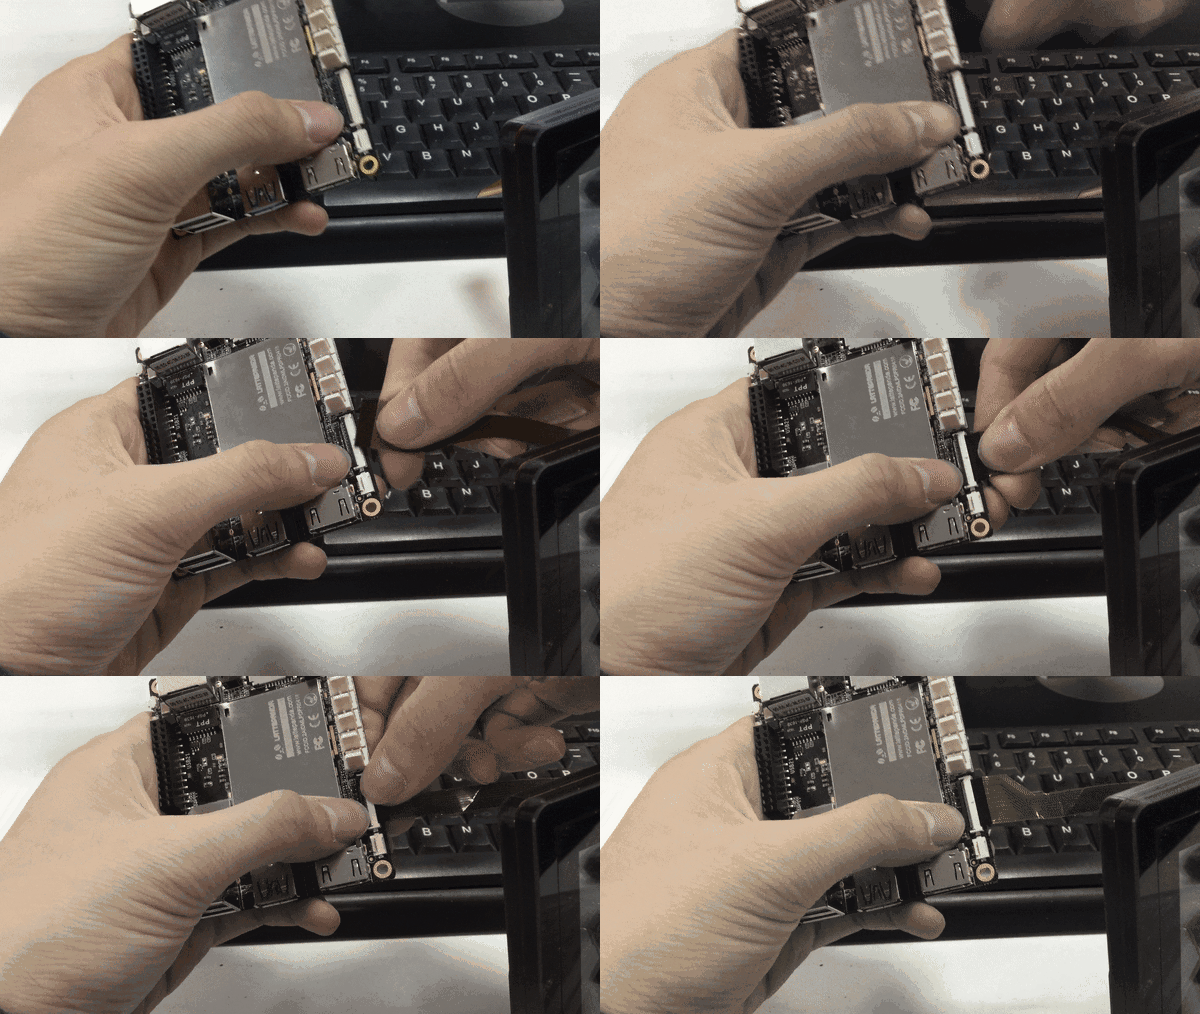
You now have a visual interface for your LattePanda that is powered directly from the board!
Next, connect to Wi-Fi:
1. Connect the Wi-Fi antenna by plugging the round shaped end into the socket labelled “ANT” located next to the 12 x 2 GPIO pins on the board.
2. In Windows select a Wi-Fi connection by clicking the Wi-Fi icon in the system tray at the bottom right of the screen. Follow the wizard to setup a connection. As it's using the Windows interface, you are likely familiar with this process already.
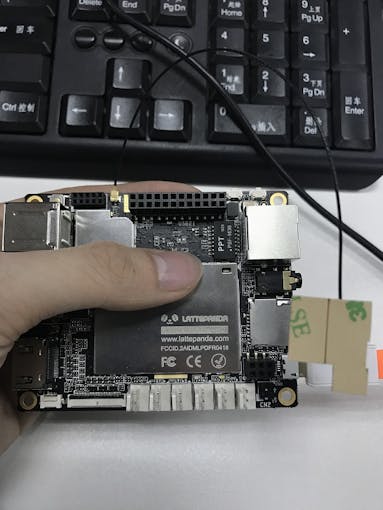
Next, power on your LattePanda
1. When plugged in, you should see the red LED indicator lights up on the underside of the board. Wait patiently for a few seconds until the LED goes out.
2. When the LED turns off, press and hold the power button for one second to turn the LattePanda on.
Now, the computer is running!
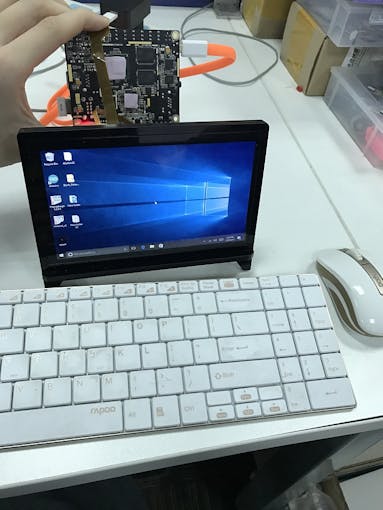
Software Setup
The LattePanda preinstalled Windows image includes Arduino IDE, but the version might have depreciated, so I recommend installing the latest version latest version of Arduino IDE. For this tutorial I have used Arduino IDE 1.8.1
Using this version will prevent any compilation errors that might come from using an older, incomaptible version of Arduino IDE.
Next, install the Blynk app and Blynk Library. Details for this can be found in the official documentation from Blynk.
Build a Smartphone Control App
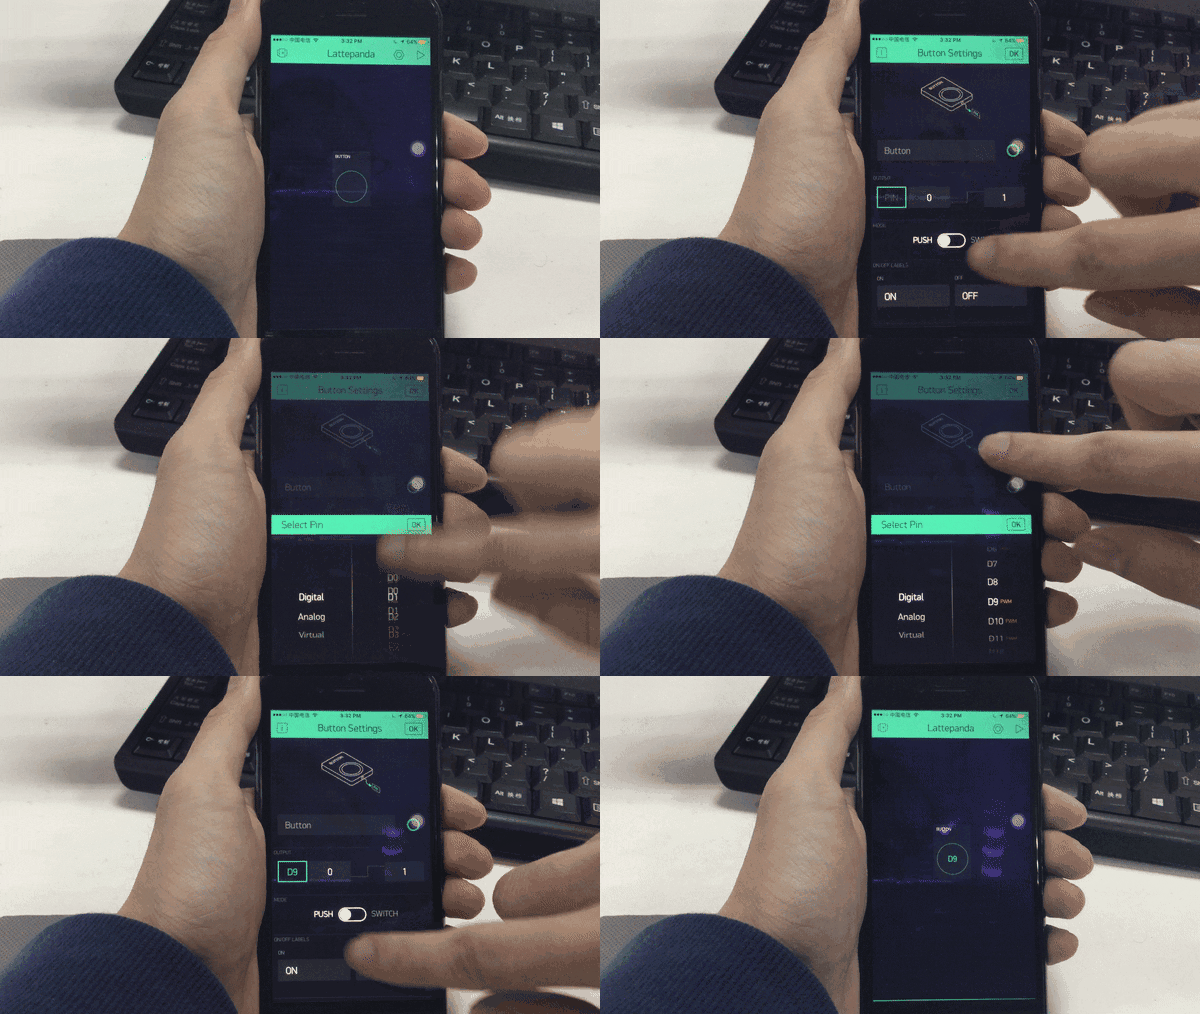
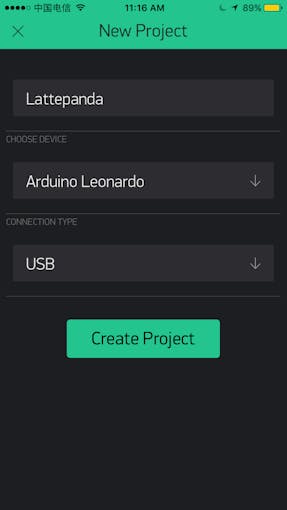
1. Open the Blynk App and create new project.
2. Choose the hardware and communication type you are going to use.
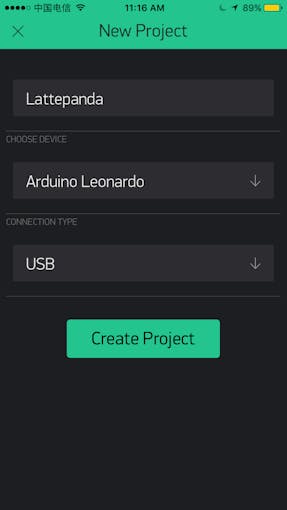
3. Add Button widget. You can hold and drag it to reposition it. Tap once to get to Widget Settings.
4. In Widget Settings set the PIN you want to control. (My LED is connected to pin 9)
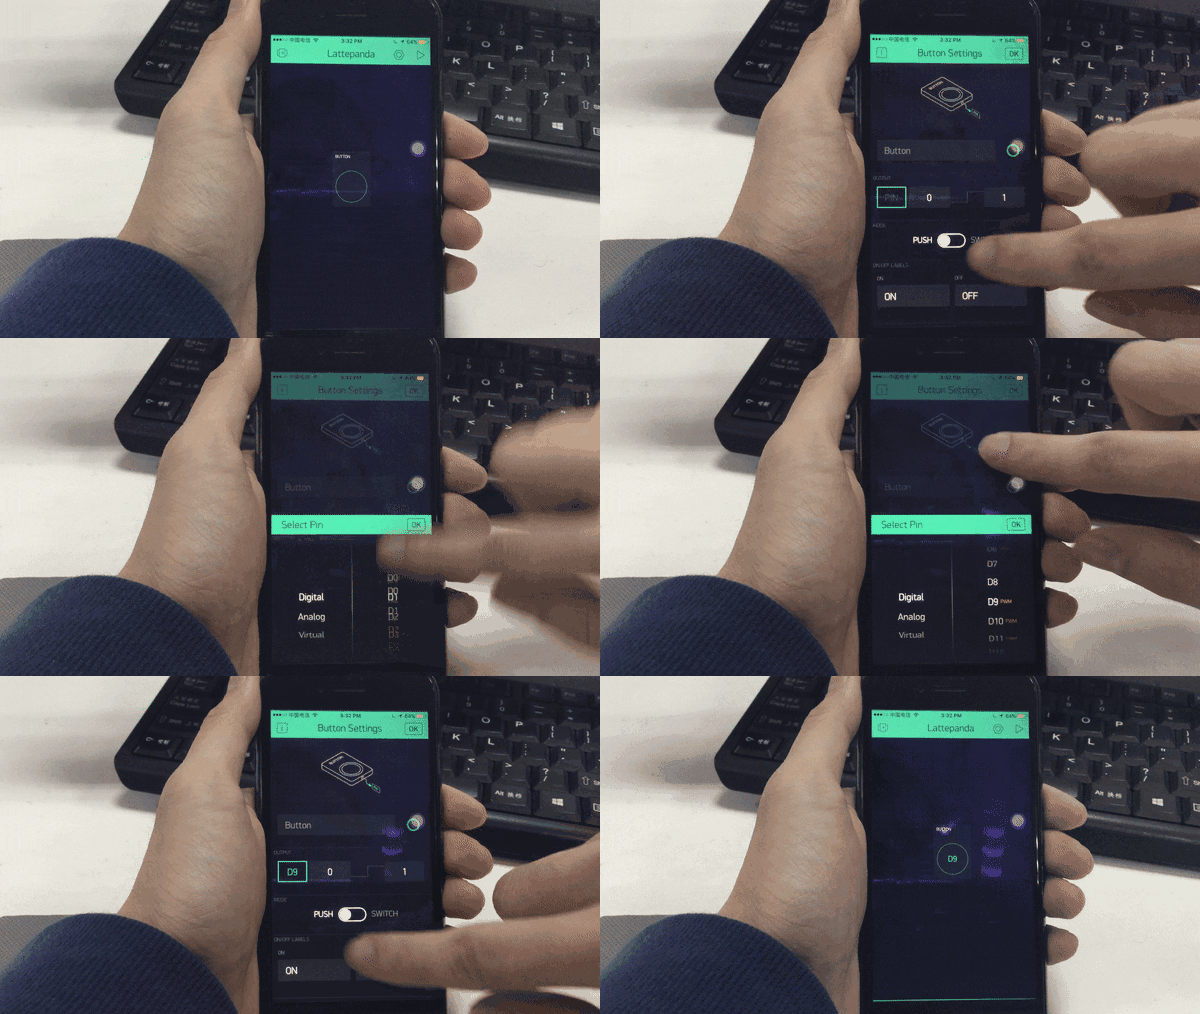
5. Check your e-mail. You will find your authorization token. You can use it in your code.

Upload the Program
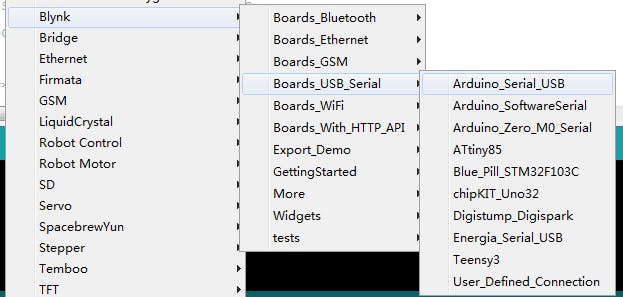
You can open the example sketch or copy the code attached to this project. Upload it to the LattePanda's onboard Arduino Leonardo.Make sure that you have selected Tools > Board > Arduino Leonardo
Also make sure you are communicating on the correct serial port.
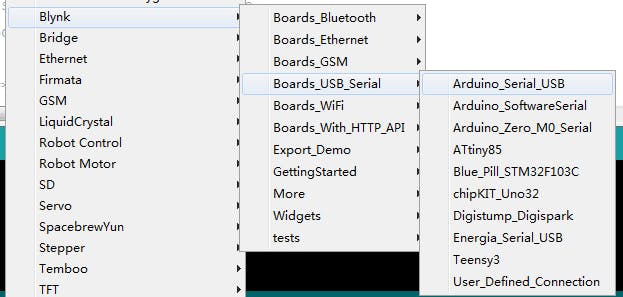
Note: If your Arduino IDE is an older version, you may receive the following error: 'Blynk' was not declared in this scope.
To avoid this, I recommend you use the latest version of the Arduino IDE.
Communicating with Blynk
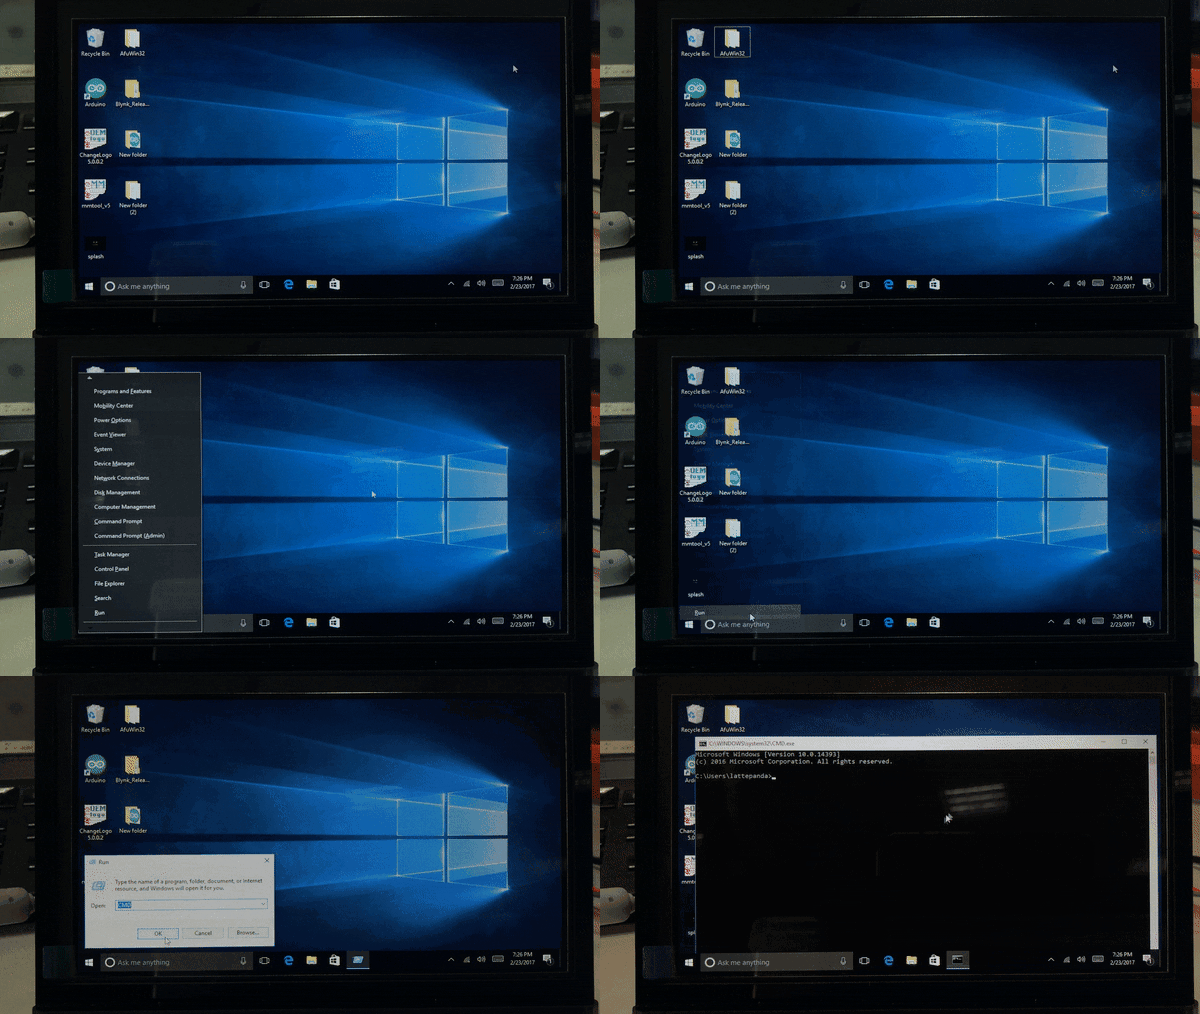
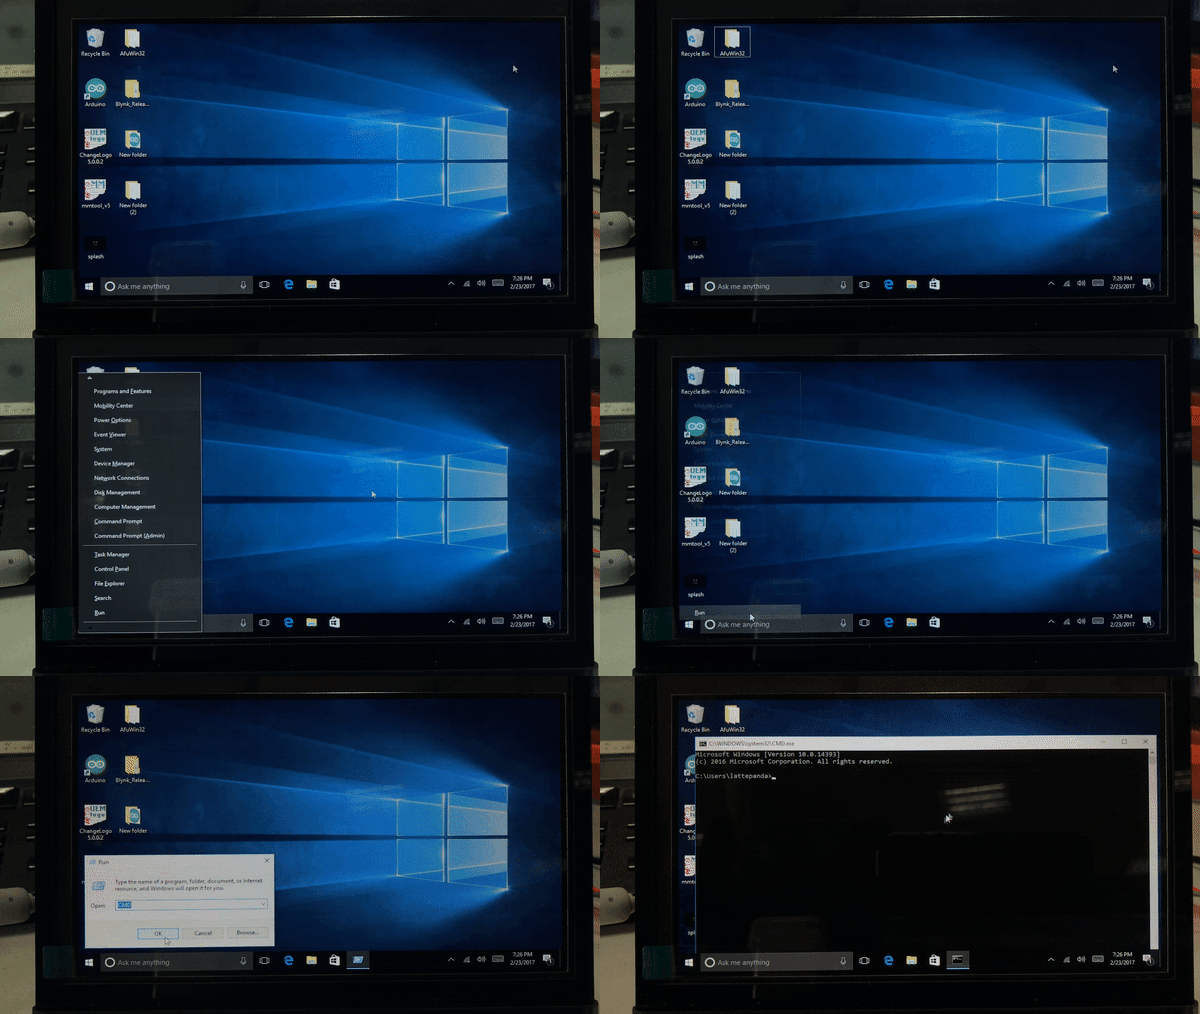
Open a command prompt in Windows by pressing the Windows Key + R, typing "cmd" and pressing enter.
Find the directory of your Blynk scripts. By default they will be located in:
C:\Program Files\Arduino\libraries\Blynk\script
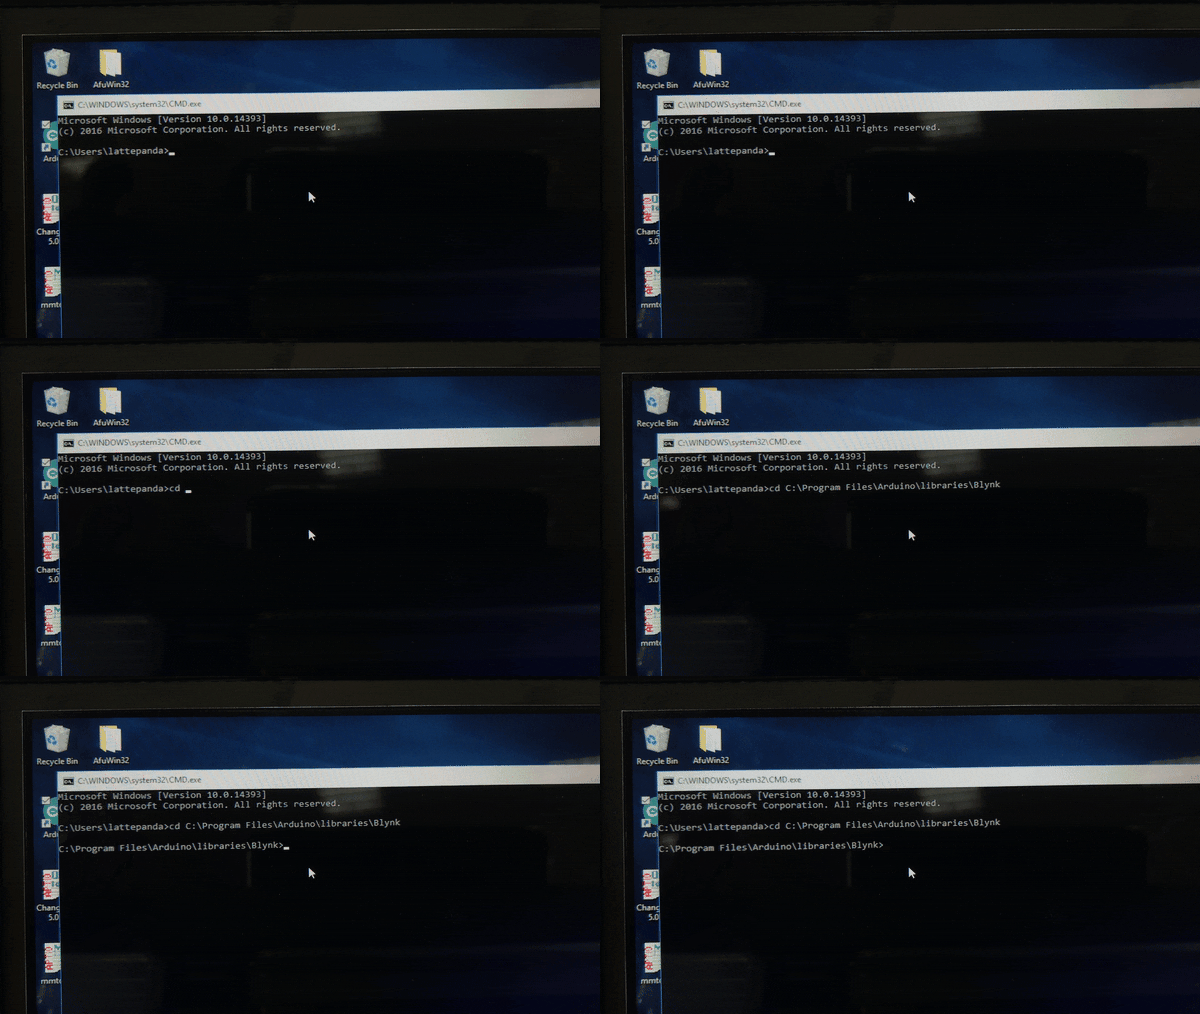
Navigate to the scripts directory in the command terminal using the cd command, e.g.:
cd C:\Program Files\Arduino\libraries\Blynk\scripts
Press enter.
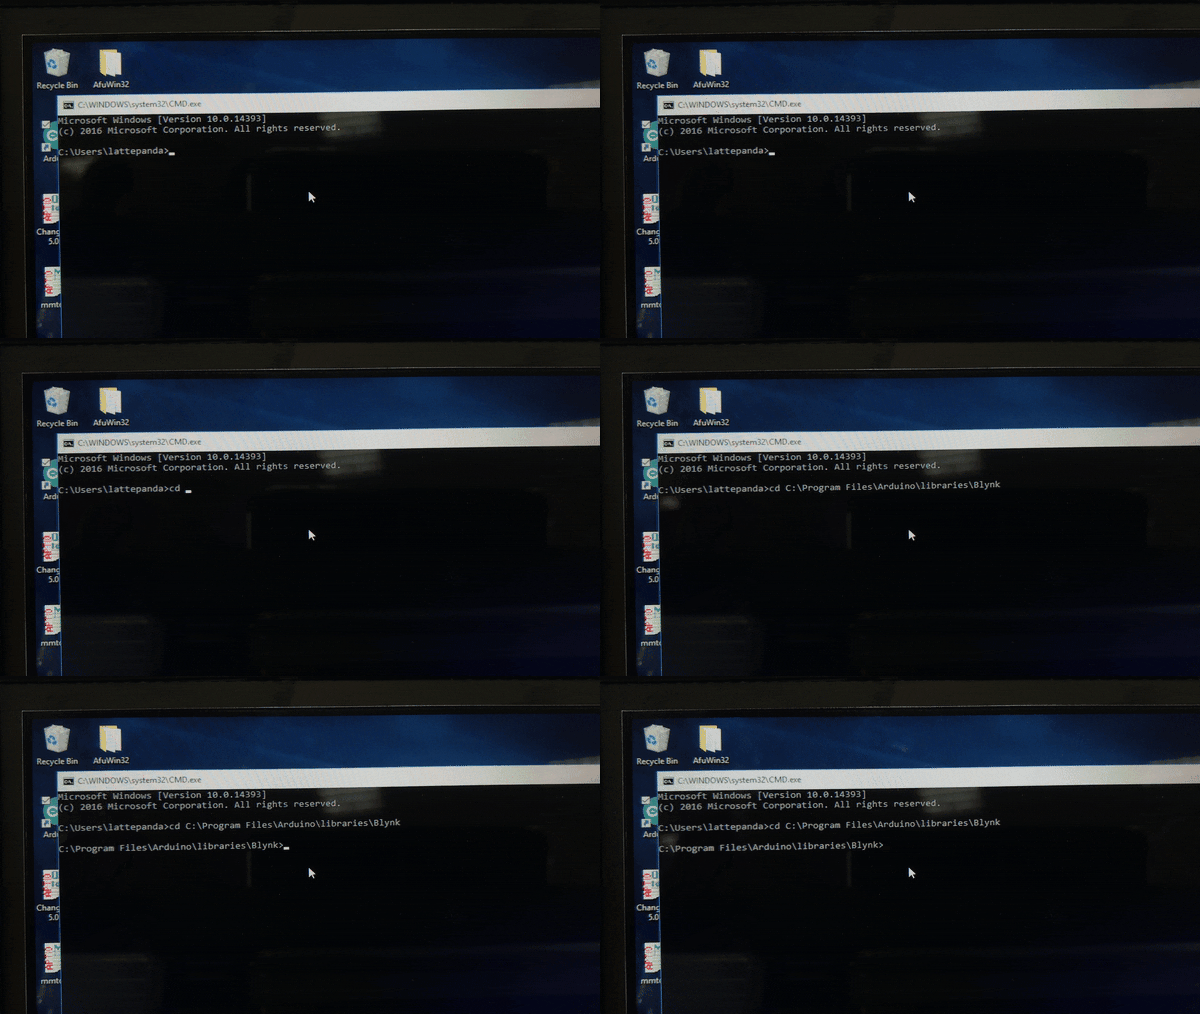
Next, input blynk-ser.bat -c COM5 (where COM5 is the COM port for your LattePanda's Arduino - this might be different for you. You can check in Arduino IDE)
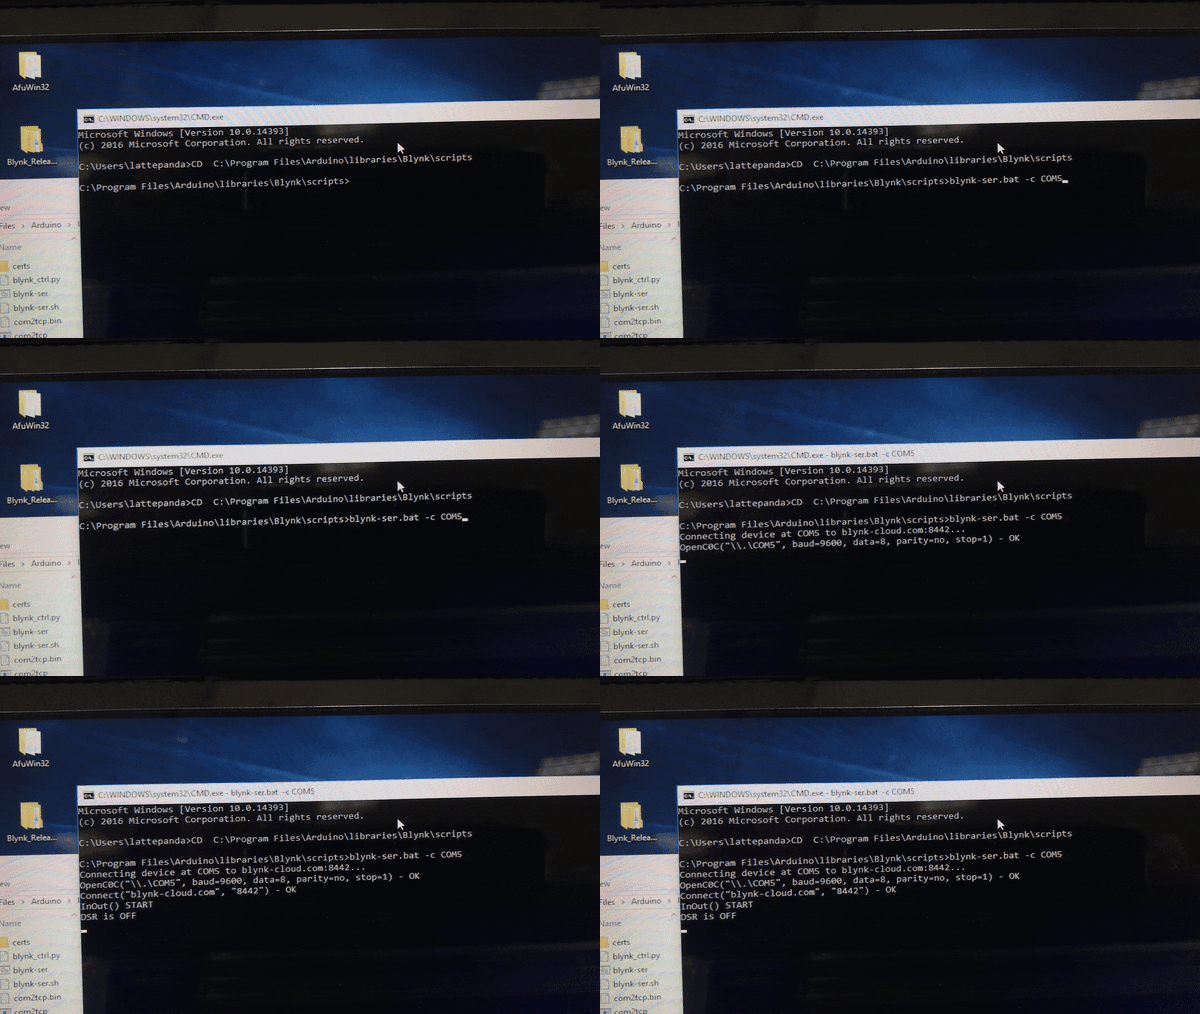
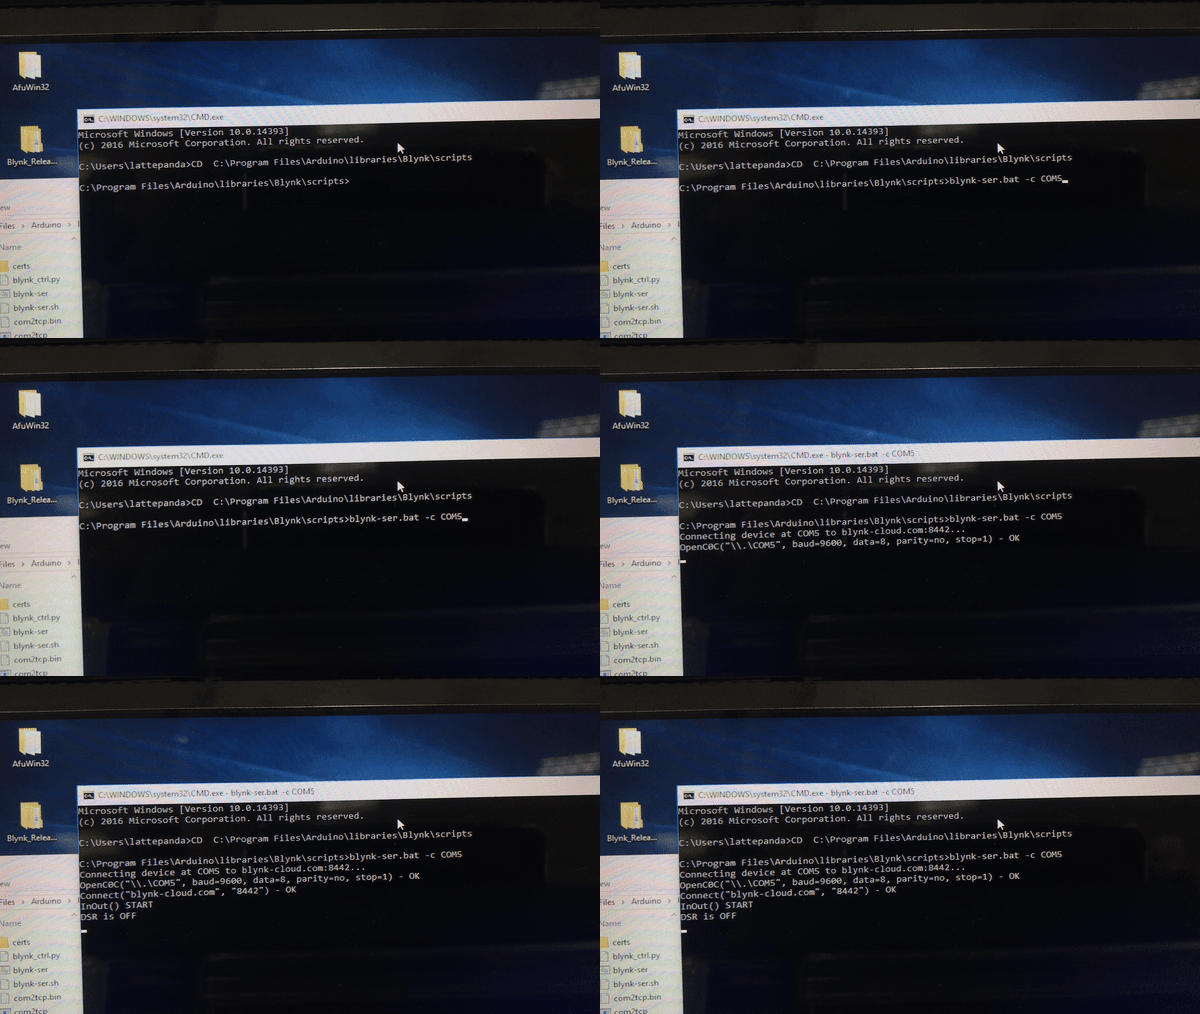
Hit enter two times so that it looks like this.
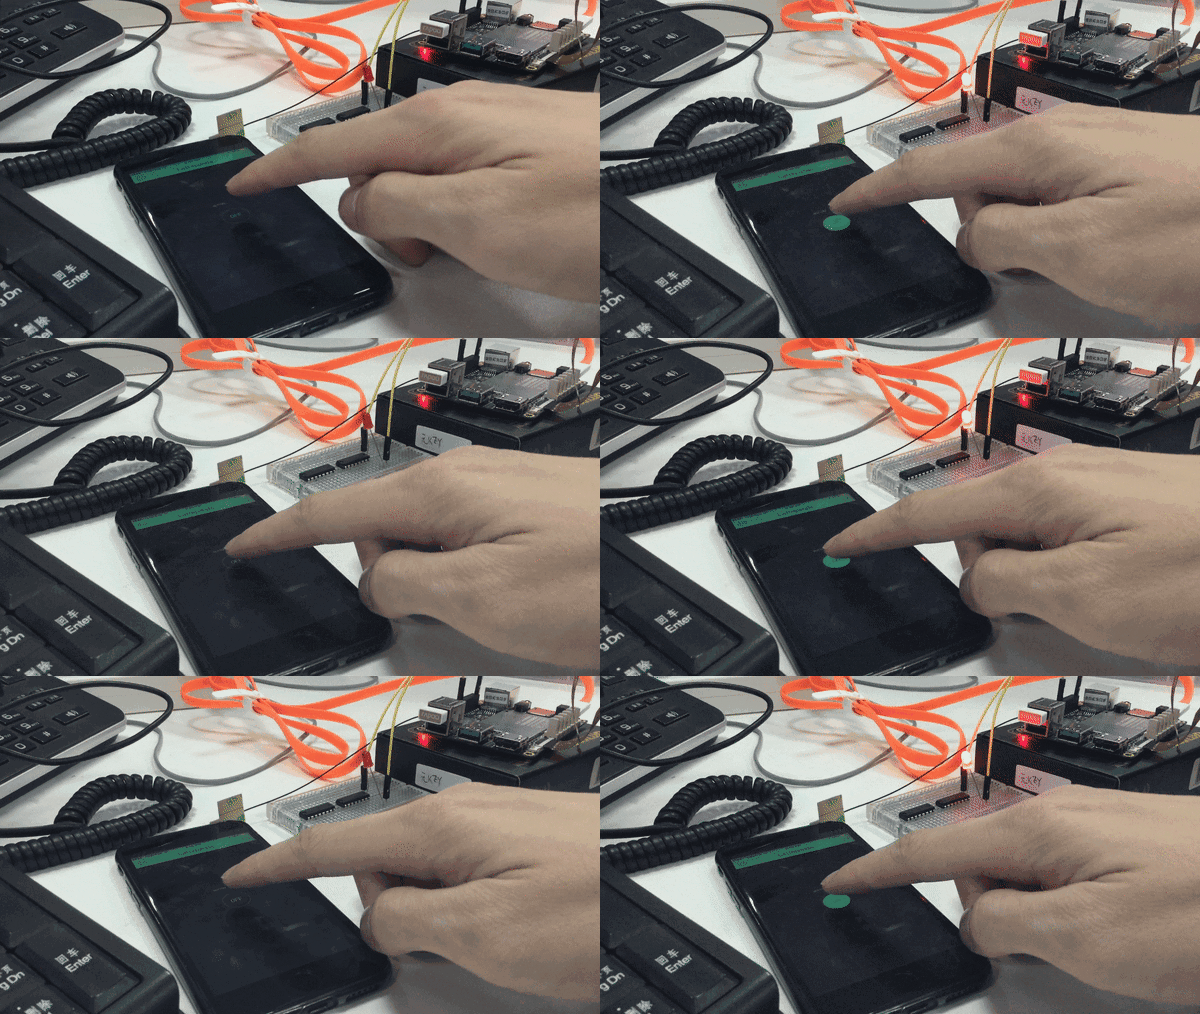
Press PLAY in the Blynk App.
You should now be able to control the LED with the button on your smartphone! Hello IoT world!
How It Works
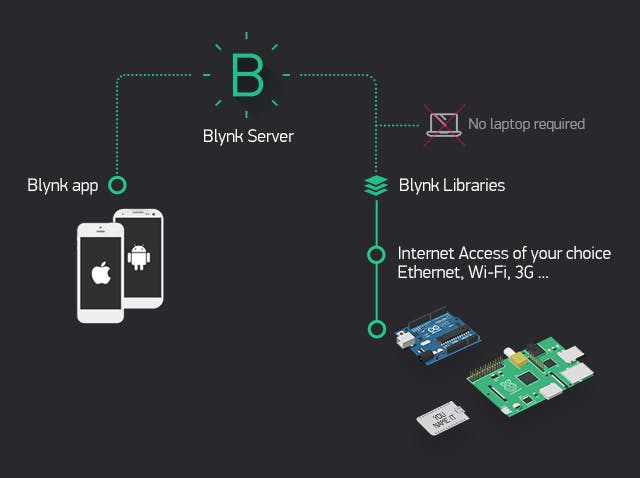
According to the Blynk documentation, every time you press a button in the Blynk app, the message travels to Blynk's Cloud, where it magically finds its way to your hardware. It works the same in the opposite direction and everything happens in a "blynk" of an eye.

I hope you had fun using Blynk and LattePanda. The LED example is very simple, but the concept can be developed to carry out larger applications. Try it yourself!
If you liked this project, have any questions, or can think of any cool IoT applications, let me know in the comments!
Code
#include <SoftwareSerial.h>
 SoftwareSerial DebugSerial(2, 3);
 #define BLYNK_PRINT DebugSerial
 #include <BlynkSimpleStream.h>
 char auth[] = "YourAuthToken";//Put your Auth Token here
 void setup()
 {
 DebugSerial.begin(9600);
 Blynk.begin(Serial, auth);
 }
 void loop()
 {
 Blynk.run();
 }


