TUTORIALS ESP32ESP8266 In this esp32/esp8266 tutorial we will check how to use the typedef keyword to create aliases for data types, on the Arduino core running on the ESP32 and on the ESP8266. The tests on the ESP32 were performed using a DFRobot’s ESP32 module device integrated in a ESP32 development board. The tests on the ESP8266 were performed on a DFRobot’s ESP8266 development board.
The tests on the ESP32 were performed using a DFRobot’s ESP32 module device integrated in a ESP32 development board. The tests on the ESP8266 were performed on a DFRobot’s ESP8266 development board.
ESP32 / ESP8266 Arduino: The typedef keyword
DFRobot
Apr 20 2018 261372
In this esp32/esp8266 tutorial we will check how to use the typedef keyword to create aliases for data types, on the Arduino core running on the ESP32 and on the ESP8266. The tests on the ESP32 were performed using a DFRobot’s ESP32 module device integrated in a ESP32 development board. The tests on the ESP8266 were performed on a DFRobot’s ESP8266 development board.
Introduction
In this tutorial we will check how to use the typedef keyword to create aliases for data types.
We will perform our tests on the Arduino core running both on the ESP32 and on the ESP8266. Nonetheless, this is a C/C++ language feature, so we should be able to use it in the Arduino environment to program any type of board.
As already mentioned, the typedef keyword allows for the creation os alias for data types, which can be used, for example, to replace a complex type name [1].
The basic syntax for the typedef keyword is the following:
typedef data_type_name alias
The tests on the ESP32 were performed using a DFRobot’s ESP32 module device integrated in a ESP32 development board. The tests on the ESP8266 were performed on a DFRobot’s ESP8266 development board.
The code
We will start our code by creating an alias to the int data type. We will create an alias called integer. Following the syntax shown in the introductory section, we first use the typedef keyword, followed by the name of the type (int), followed by the alias (integer).
typedef int integer;
Moving on to the Arduino setup function, we start by opening a serial connection to output the results of our program.
Serial.begin(115200);
Next we will declare a variable of our defined alias. Basically, we will be declaring an int variable, but using a different name.
integer i = 10;
From this point onward, we use the variable i as an integer, independently of it being declared using an alias.
To illustrate this, we will declare an additional variable, which will be of type int. In this case, we will do the declaration without any alias.
int j = 20;
To finalize, we will print the sum of the two variables. As mentioned, the variable declared with an alias is an int, so they can be summed.
Serial.println(i+j);
You can check the final source code below.
typedef int integer;

void setup() {

  Serial.begin(115200);

  integer i = 10;
  int j = 20;

  Serial.println(i+j);
}

void loop() {}
Testing the code
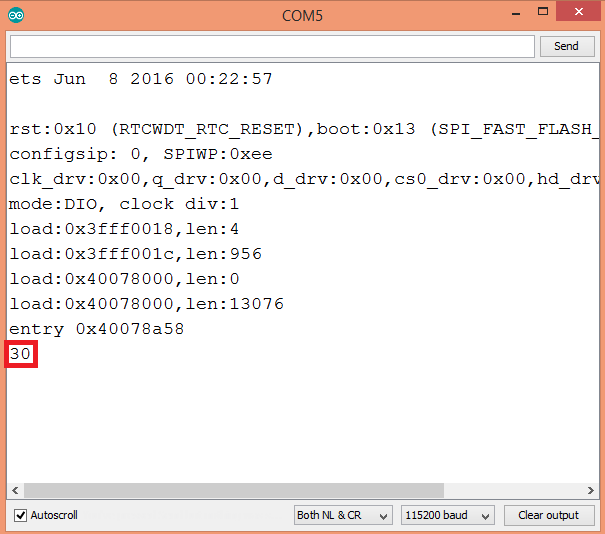
To test the code, simply compile it and upload it to your device using the Arduino IDE. When it finishes, open the Serial Monitor. You should get an output similar to figure 1, which shows the sum of the two variables.


